Setting up catalogue data
Creating an item group, its decodification master, a released item code, and pricing a driver row — in the order the product actually requires.
What this process achieves
A brand-new product family goes from nothing to quotable: a named family with its prefixes, an option menu that composes its model number, and one released size a quotation can actually pick.
Who is involved
Catalogue maintainers do all three creates. Today there is no separate
permission key for item groups or decodification masters — all three screens
sit behind the single item:* permission set (item:view / item:create /
item:edit) in the catalogue module. See Roles for
who holds it.
What starts it
A new family needs a catalogue entry, or an existing family needs another released size.
The steps
The product enforces a stricter order than “create three things”: an item group’s decodification master must be published before that group is offered anywhere an item code is released against it. Author the menu before the size, not after.
1. Create the item group
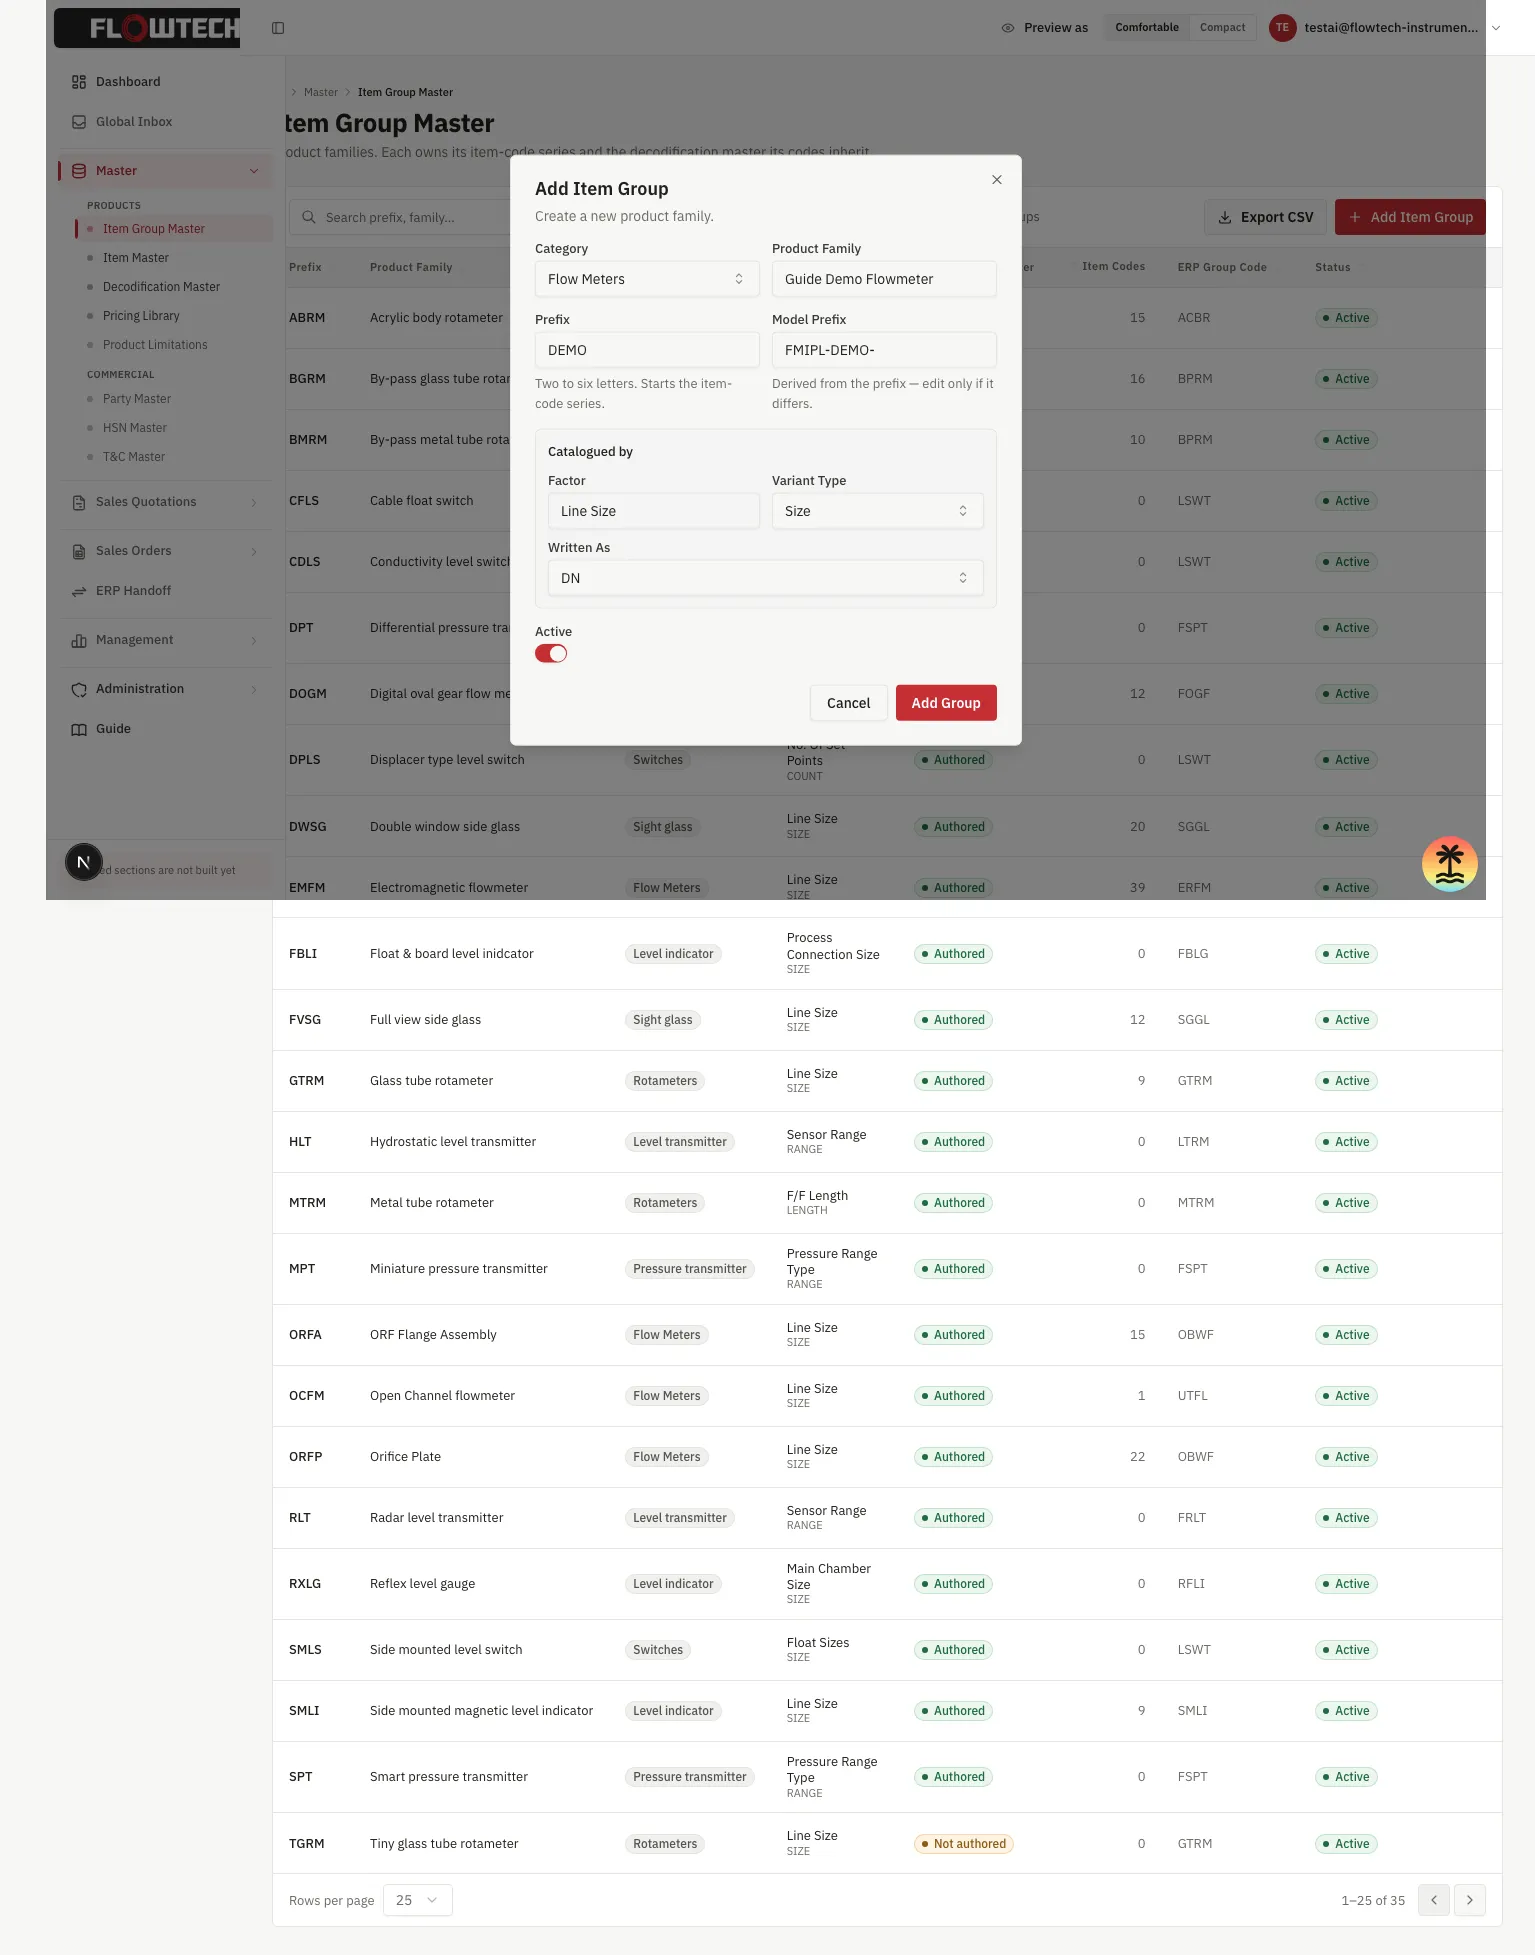
Master → Item Group Master → Add Item Group. Pick a category, name the
family, and set its prefix (starts the item-code series) and factor
(what the codes vary by — line size, pressure range, length, …). The model
prefix auto-derives from the prefix; edit it only if it should differ.
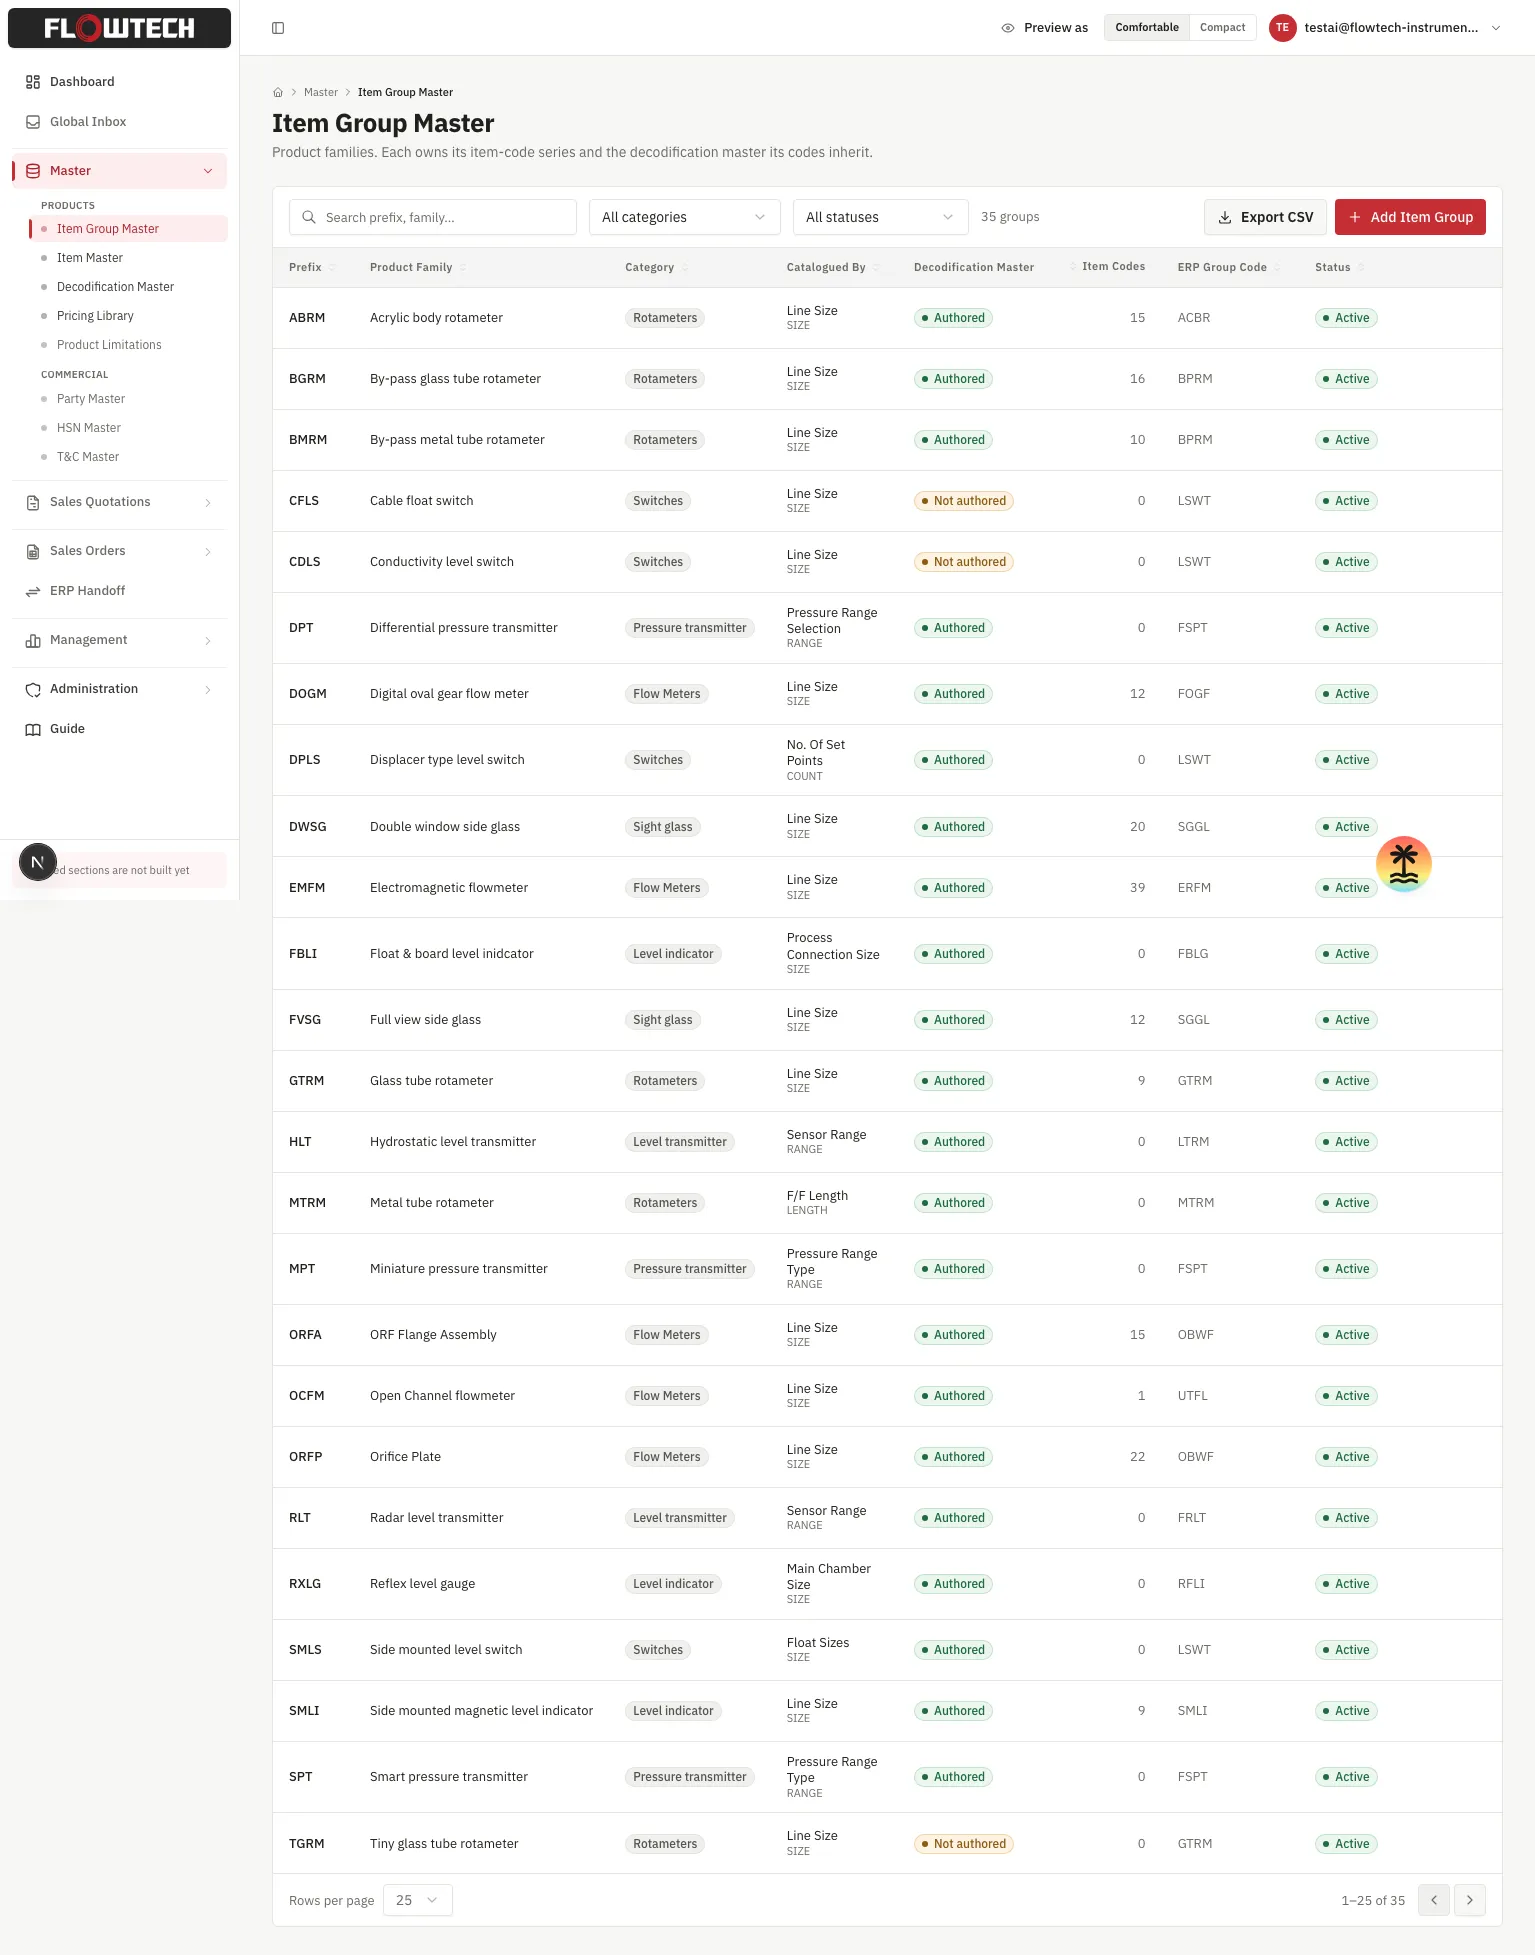
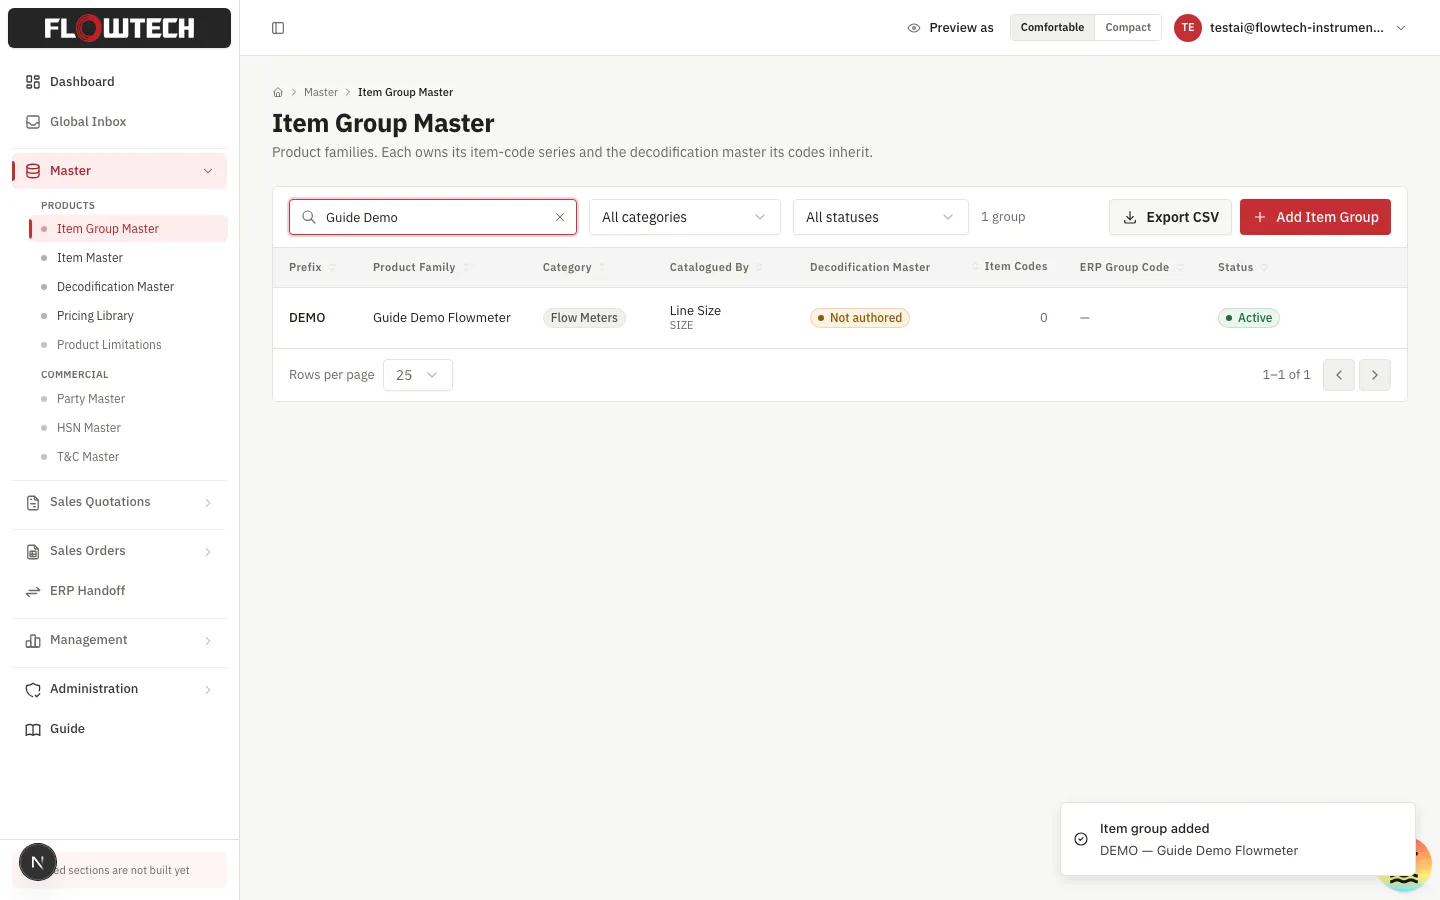
The new group appears with its decodification master marked Not authored and zero item codes — expected, since nothing has been built for it yet.
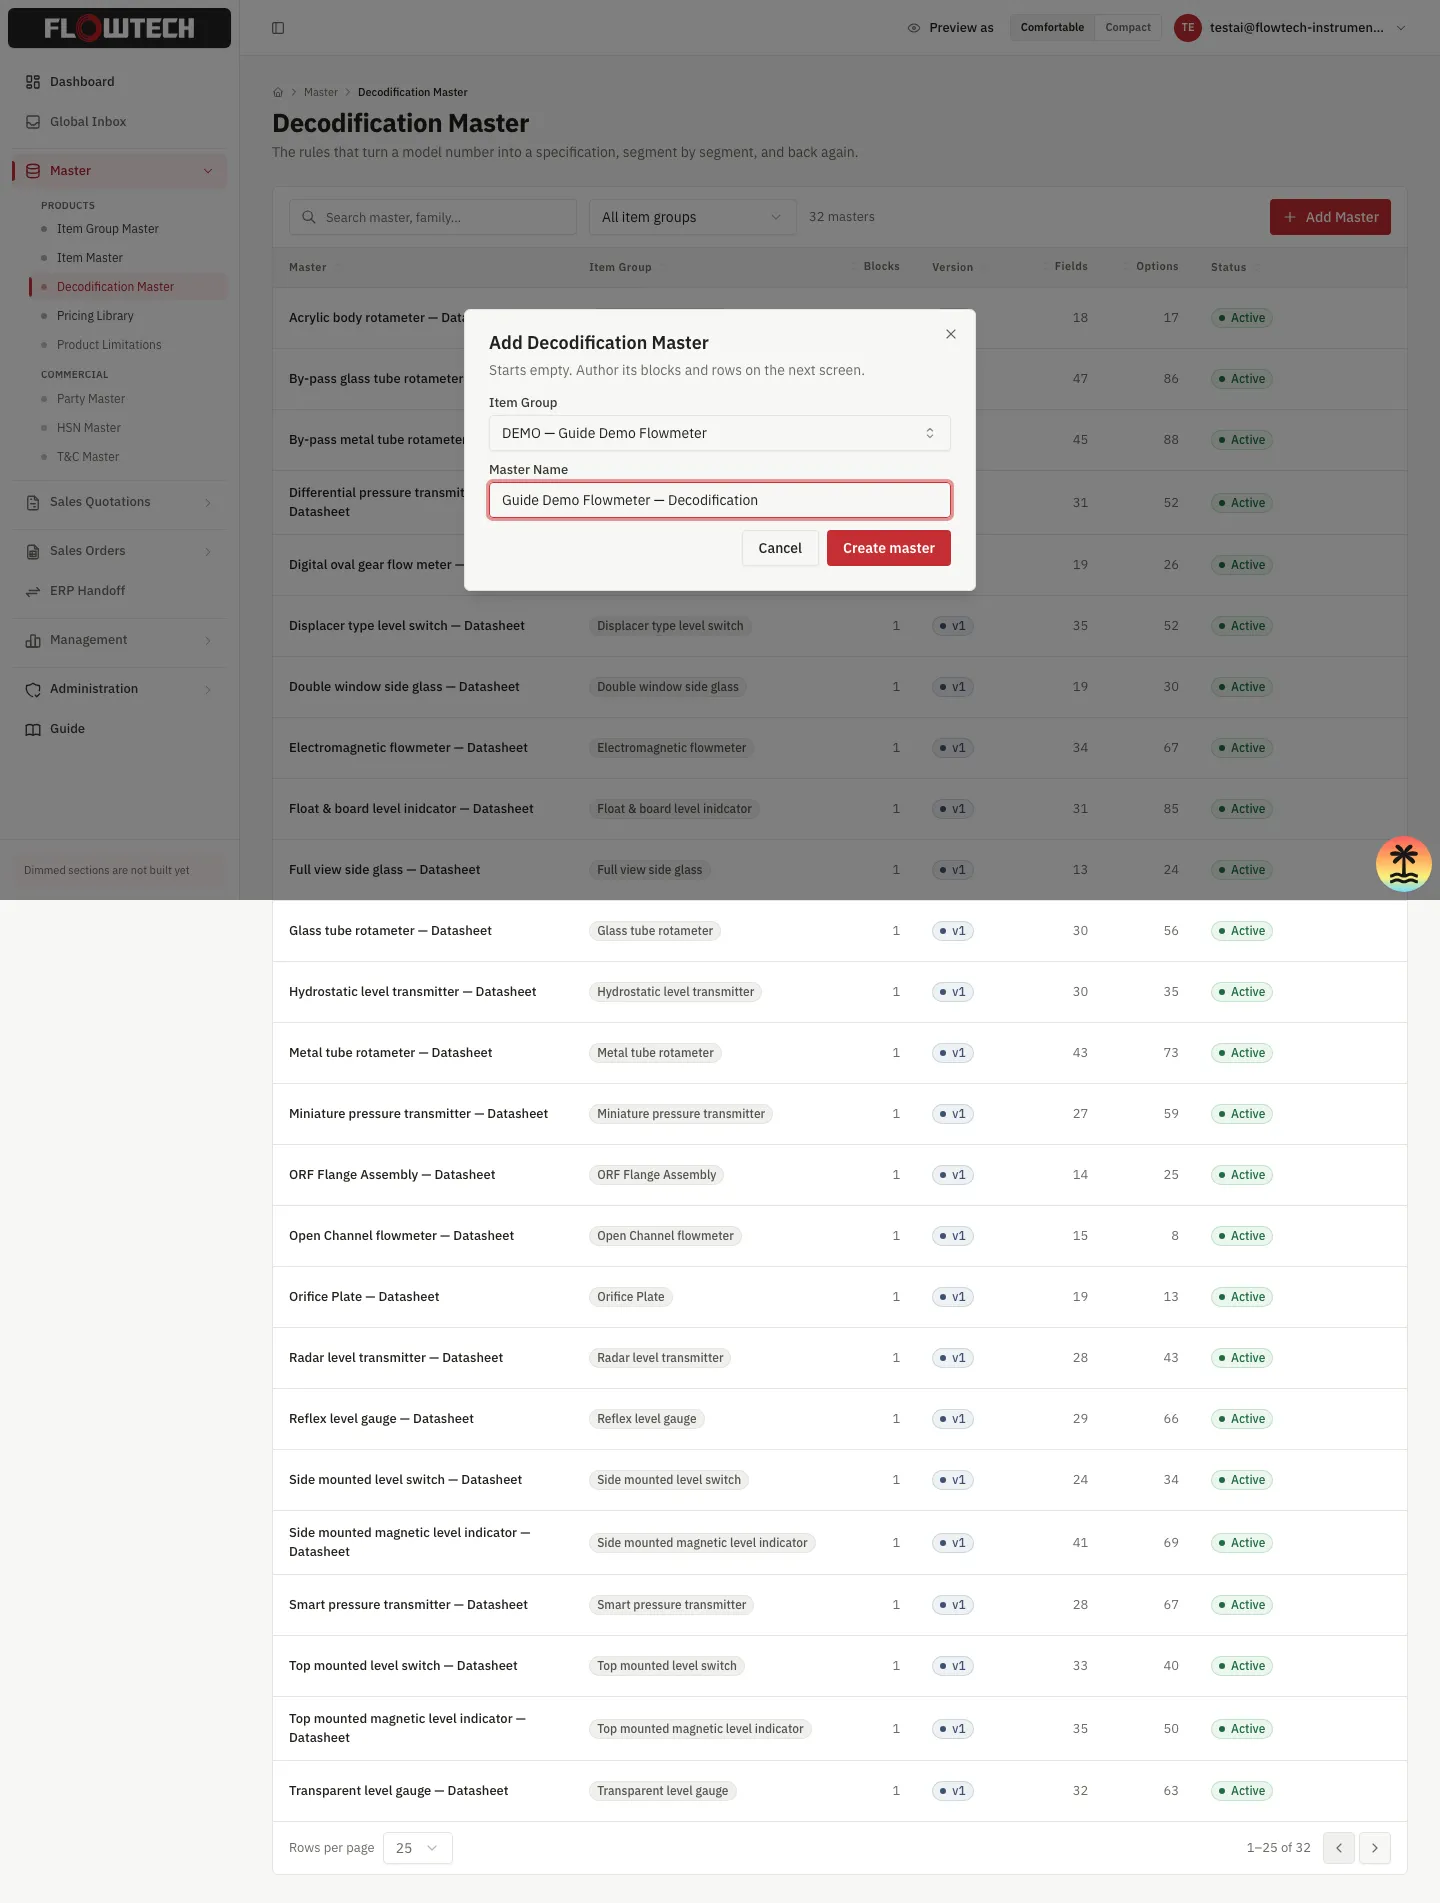
2. Author the decodification master
Master → Decodification Master → Add Master, pick the item group just
created (only groups with no current master are offered), name it, and
you land in the block editor.
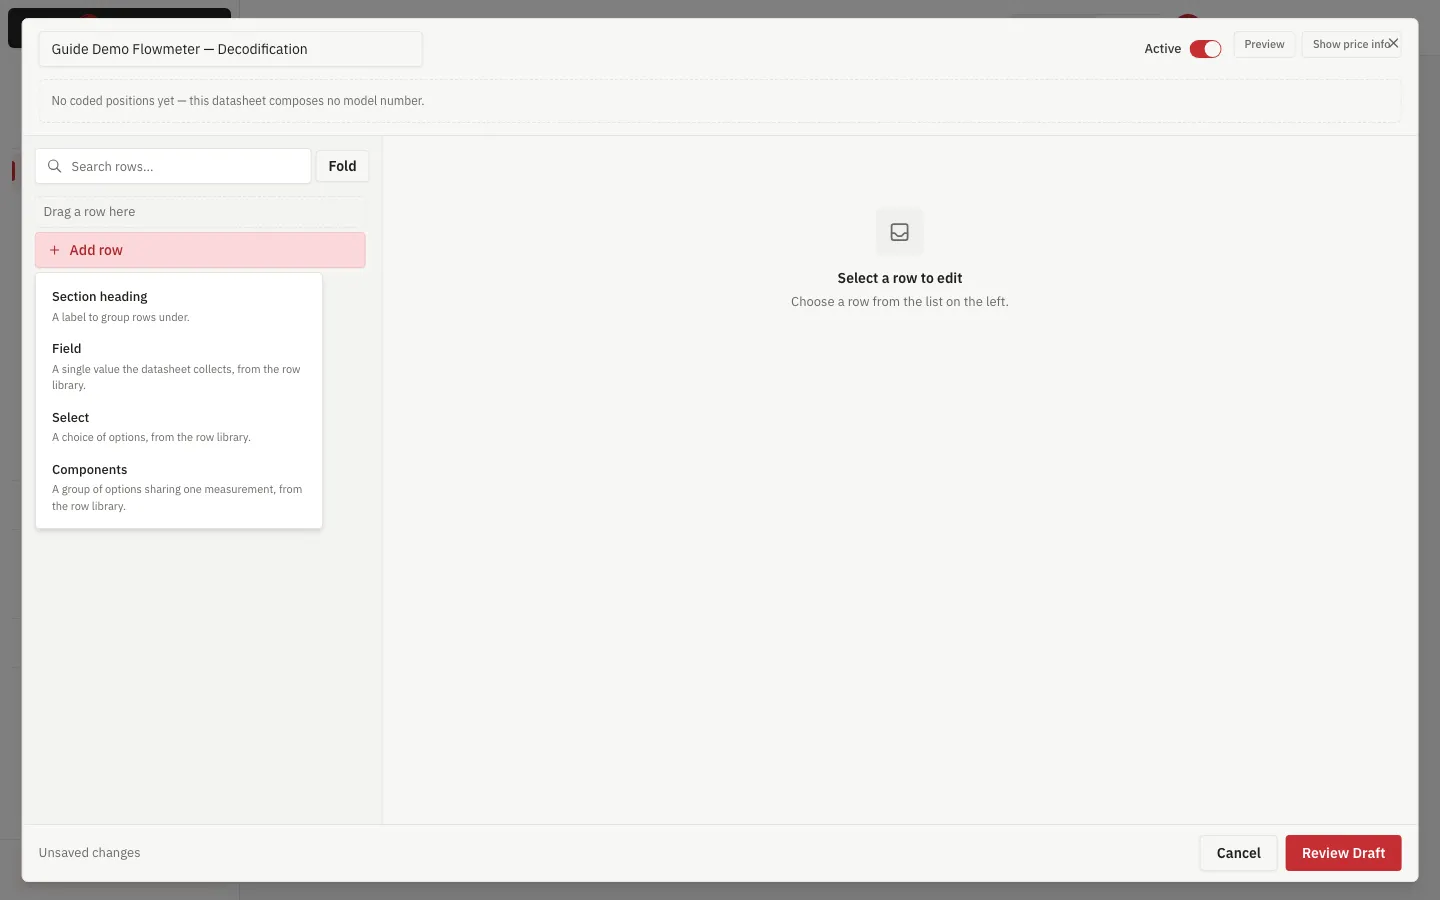
Every master starts with one implicit block — there is no “add block” control today, so everything is authored inside it. Add row offers four kinds:
Adding a Select row (searching the shared row library, or typing a new label to create one) opens it empty in the inspector on the right:
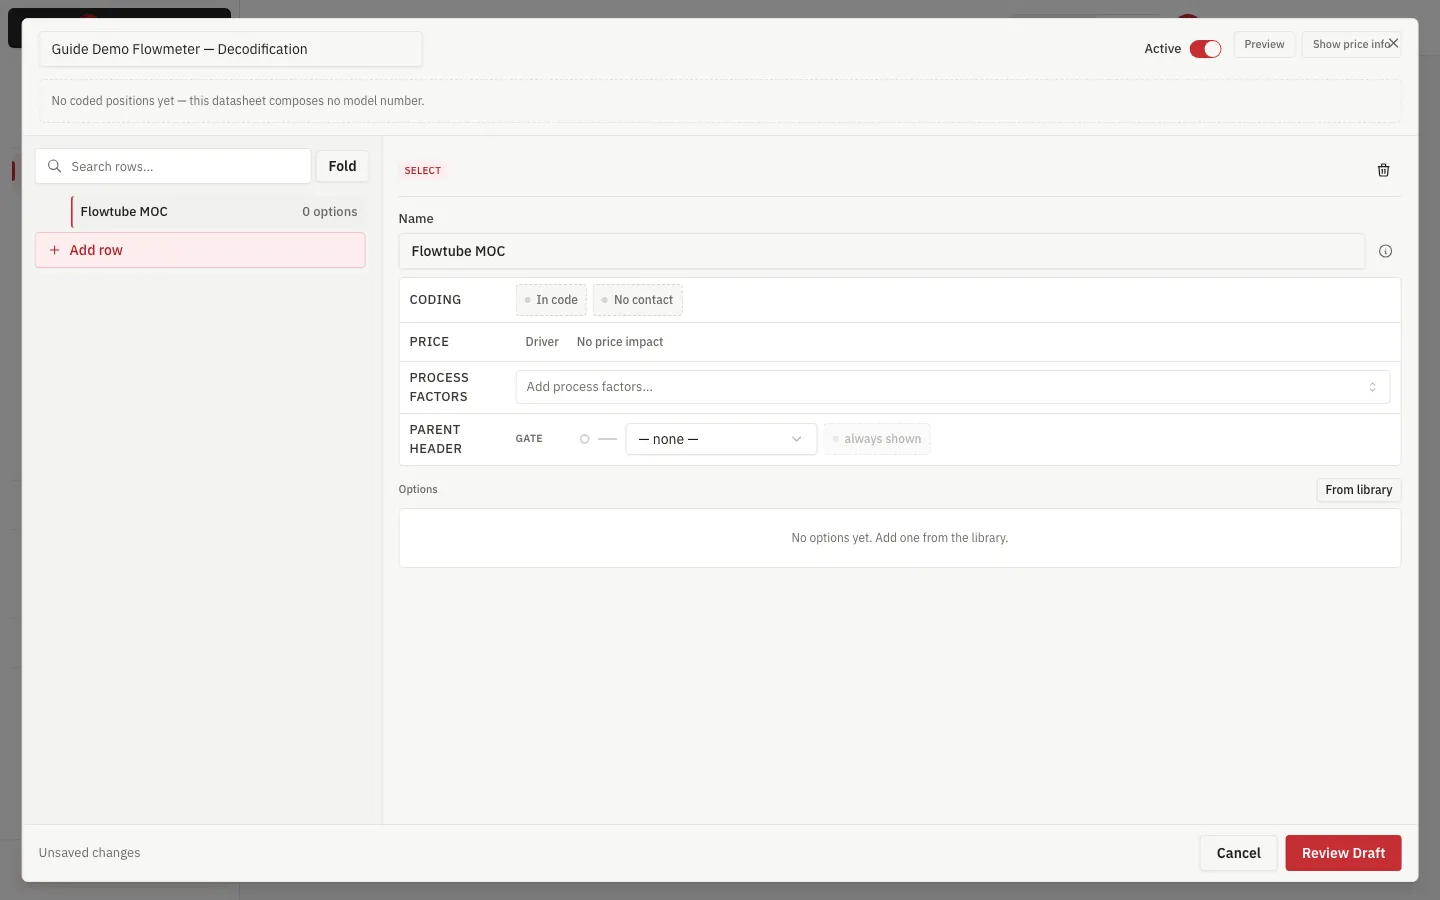
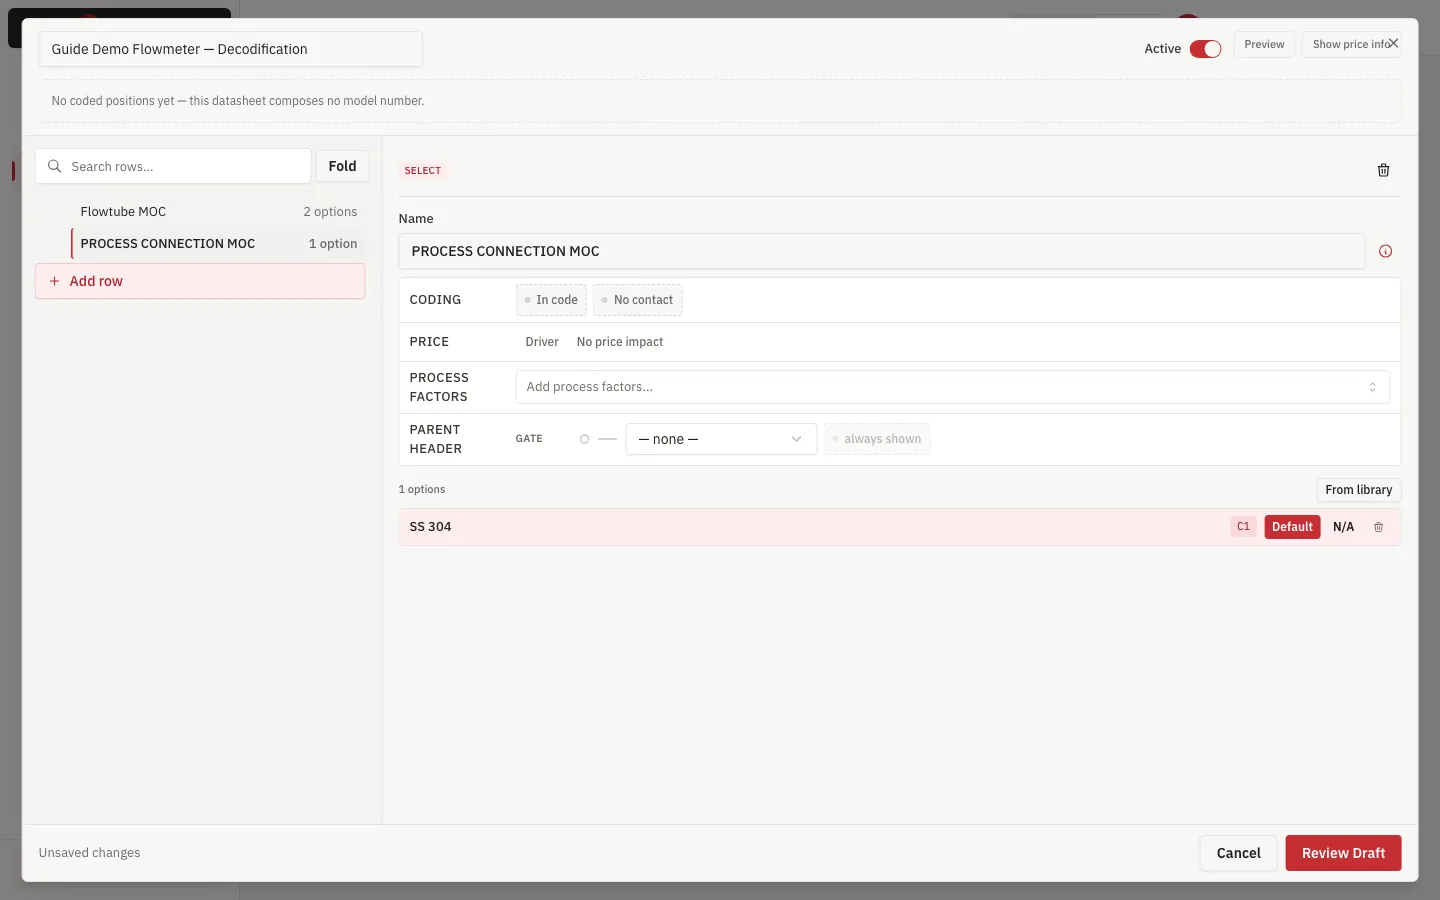
Options and positional codes. Every option comes from the shared option
library via From library; its code is auto-assigned (C1, C2, …) in
the order options are added to that row — there is no field to type a
custom code. This is what makes a code positional rather than global: adding
PTFE then SS 304 to Flowtube MOC gives SS 304 the code C2 —
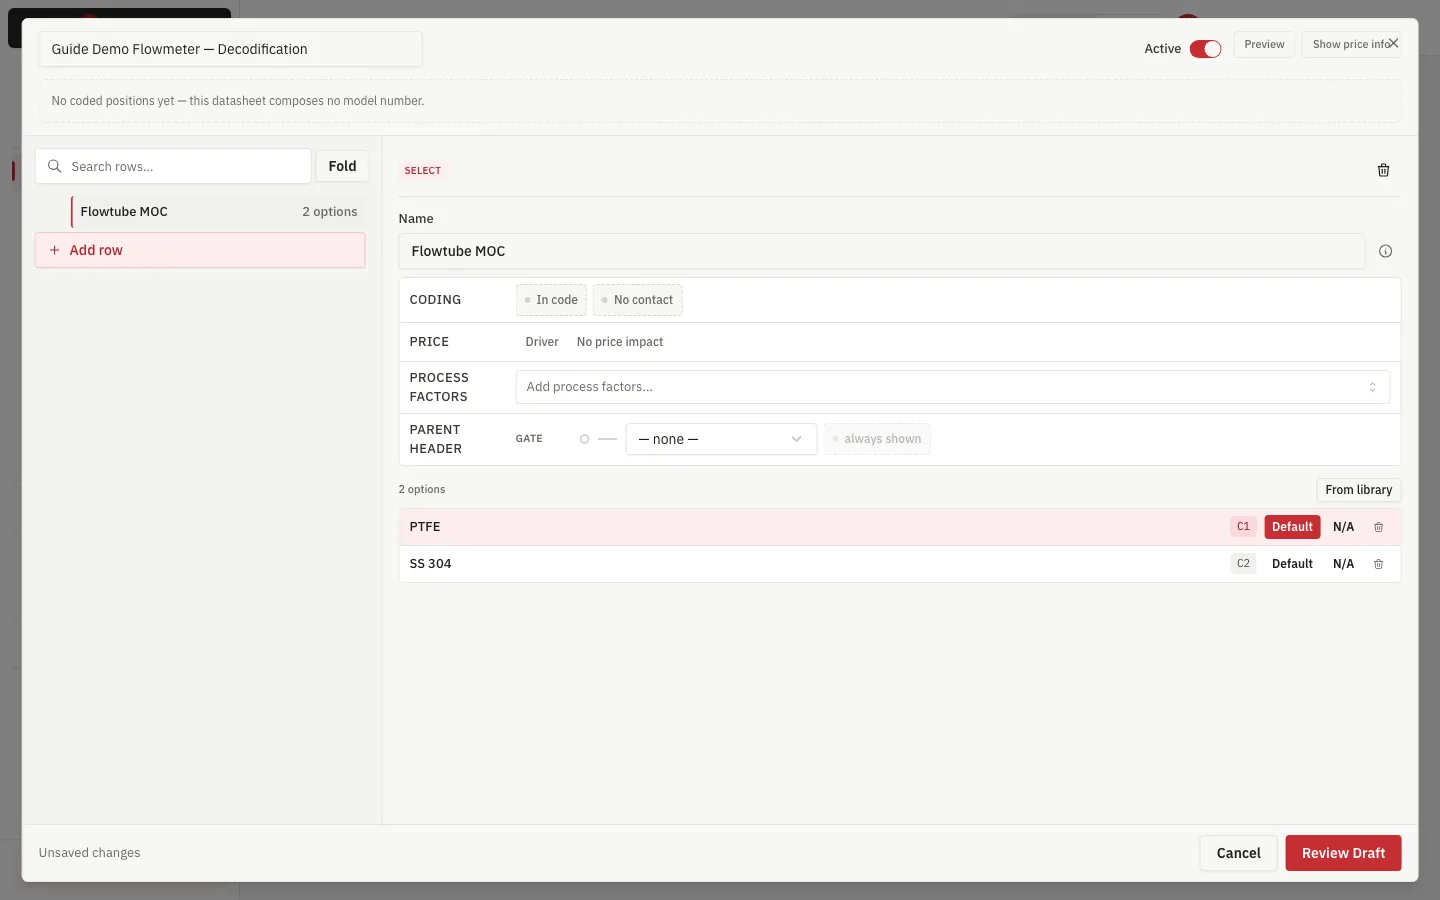
— while the very same SS 304 library value, added as the first option on a
different row (Process Connection MOC), gets C1 there instead:
Inherit, without gating. A row’s “Parent header” names one sibling row for two independent things — Gate and Material — and either can be used alone. Picking Flowtube MOC as Process Connection MOC’s parent and setting Material to “Flowtube MOC (itself)” makes this row’s material follow the parent’s, while Gate stays off (“always shown”). The banner names any parent option this row has no matching option for yet:
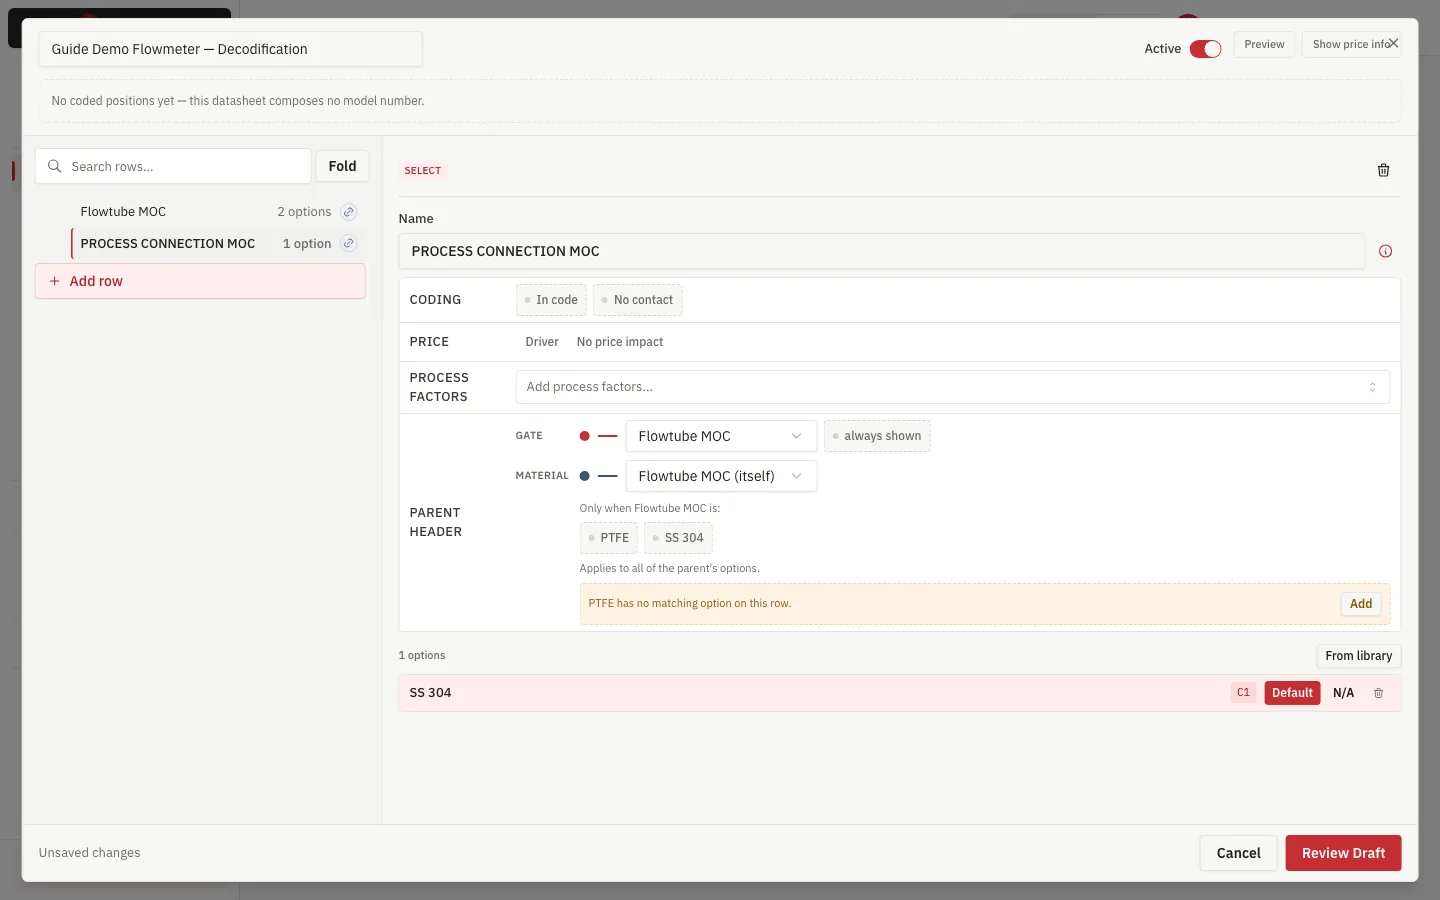
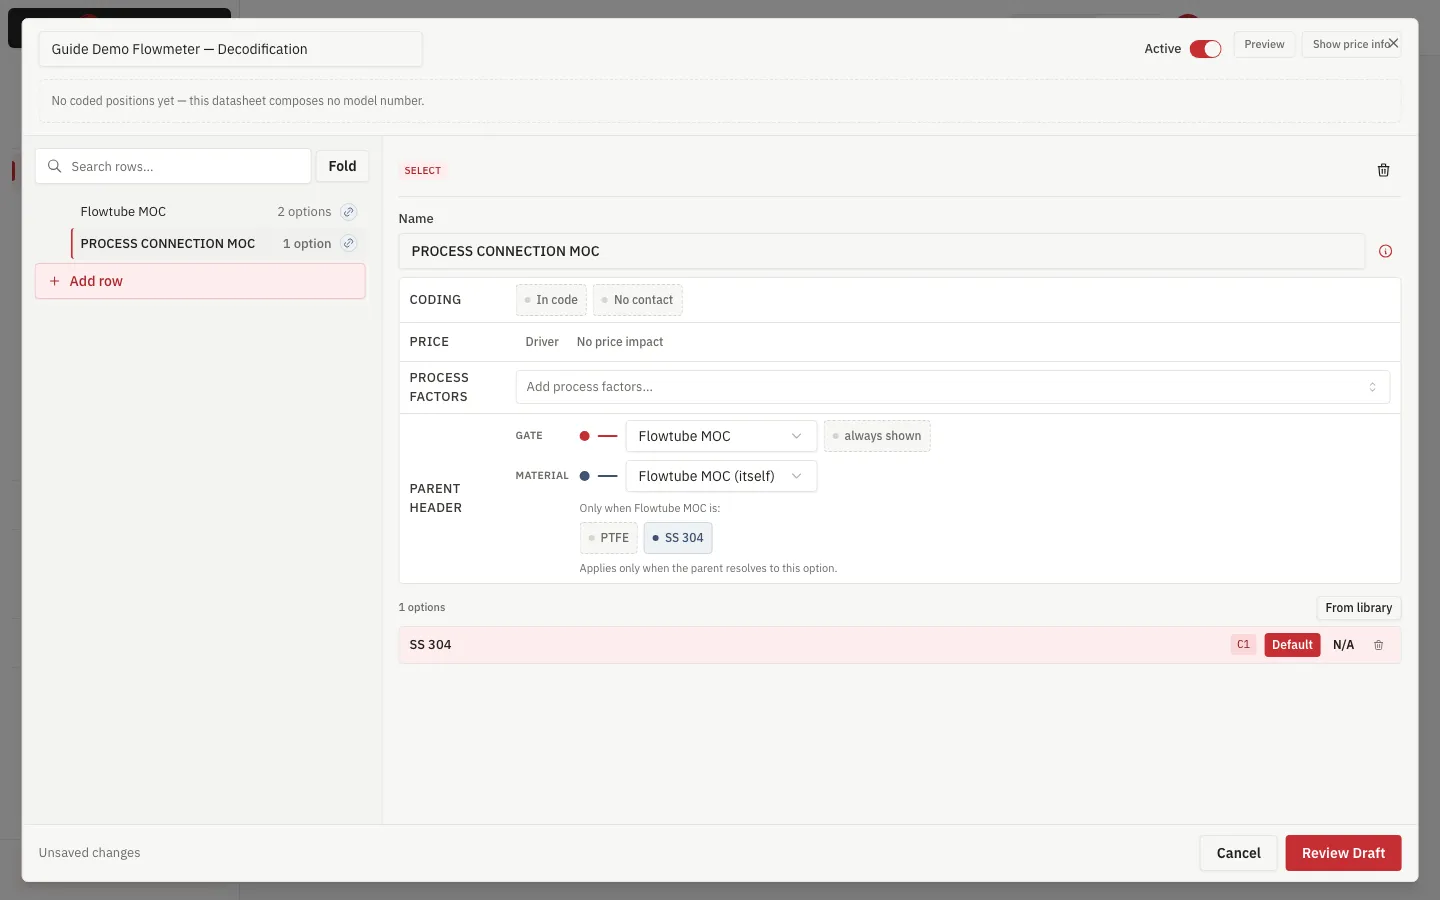
Scoping the inheritance to one parent option reads back in plain language:
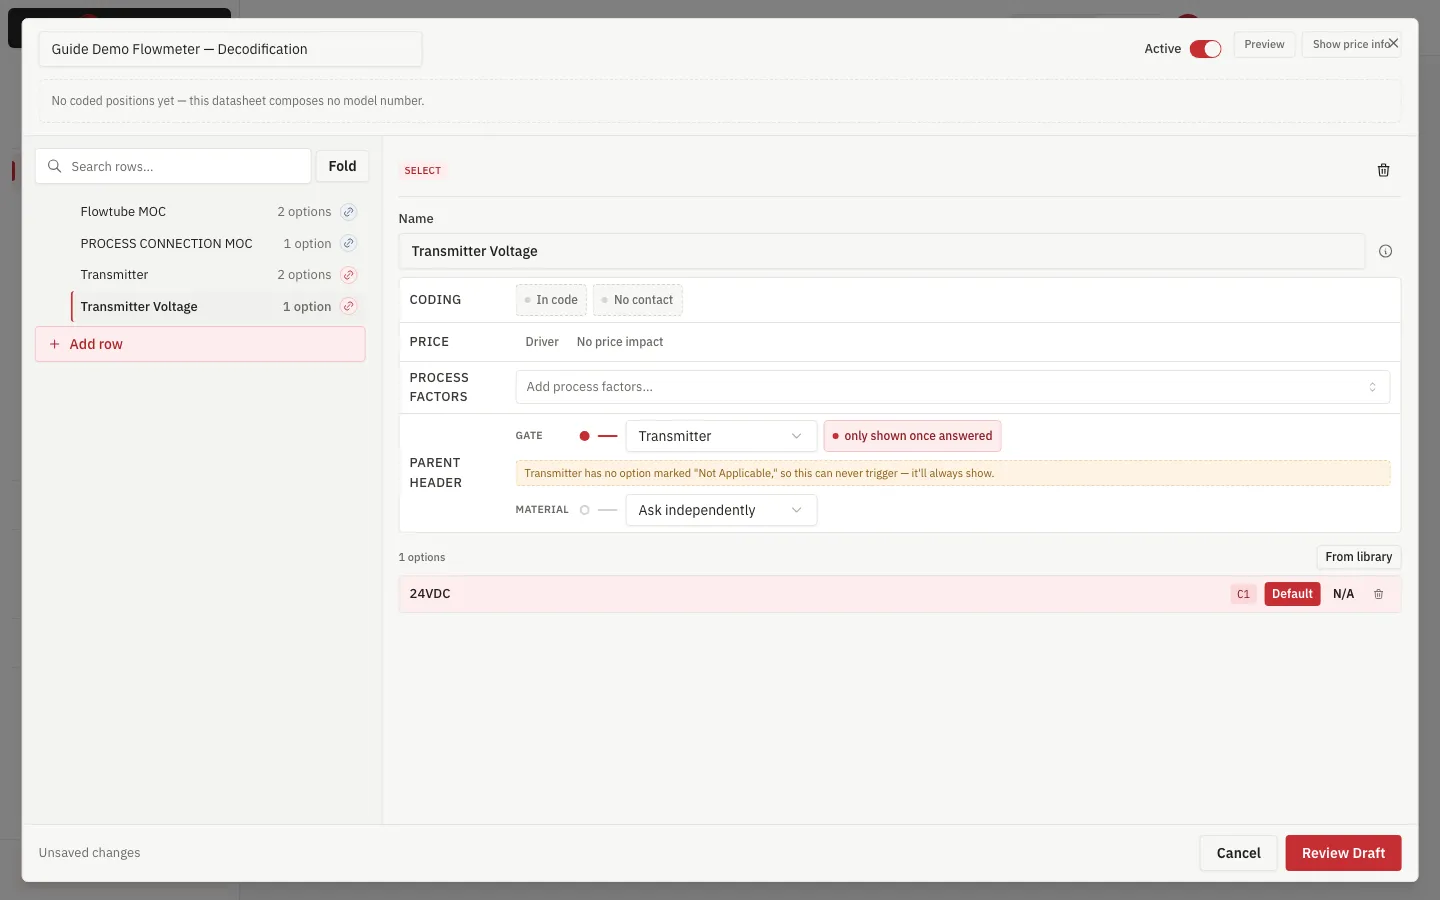
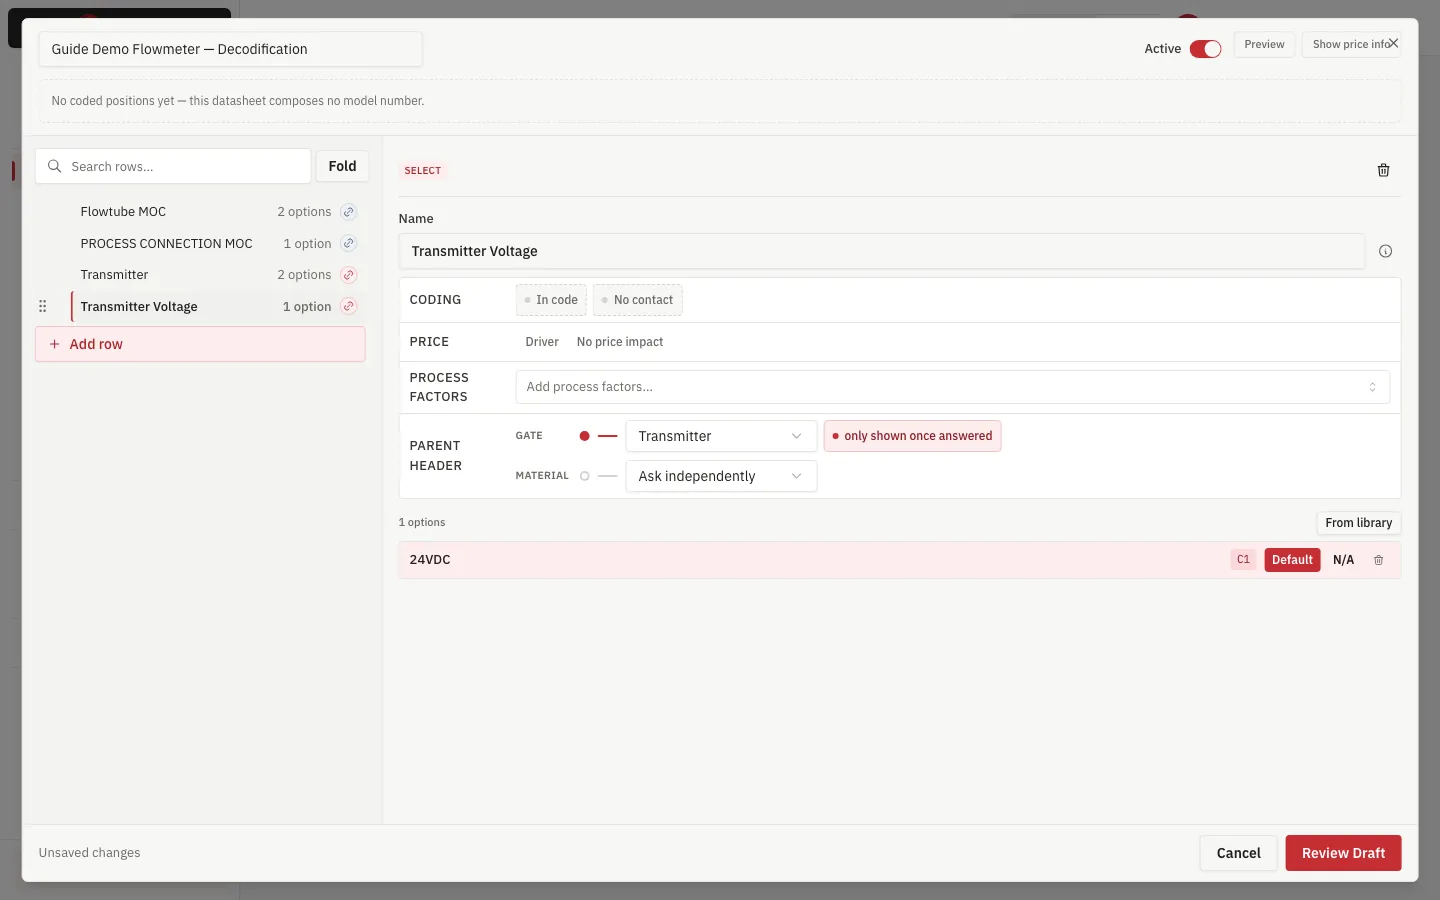
Gate, with the safety check for “Not Applicable.” A row can instead be asked only once a parent is answered. Turning that on for a parent with no option marked “Not Applicable” is caught immediately — it can never fire:
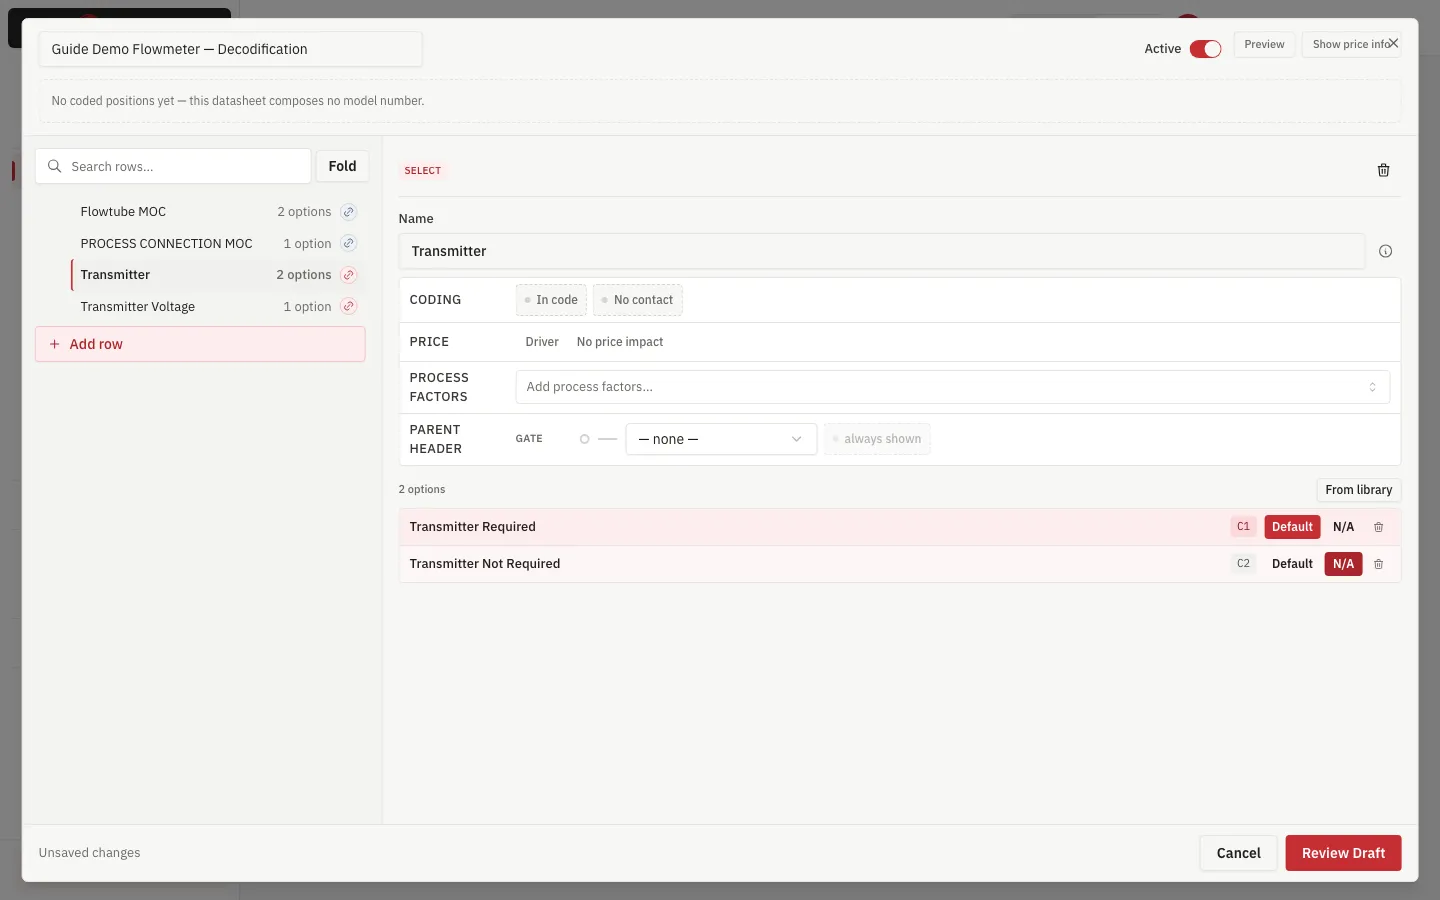
Marking the parent’s “not needed” option N/A is what lets the gate work at all:
Back on the gated child, the warning is gone:
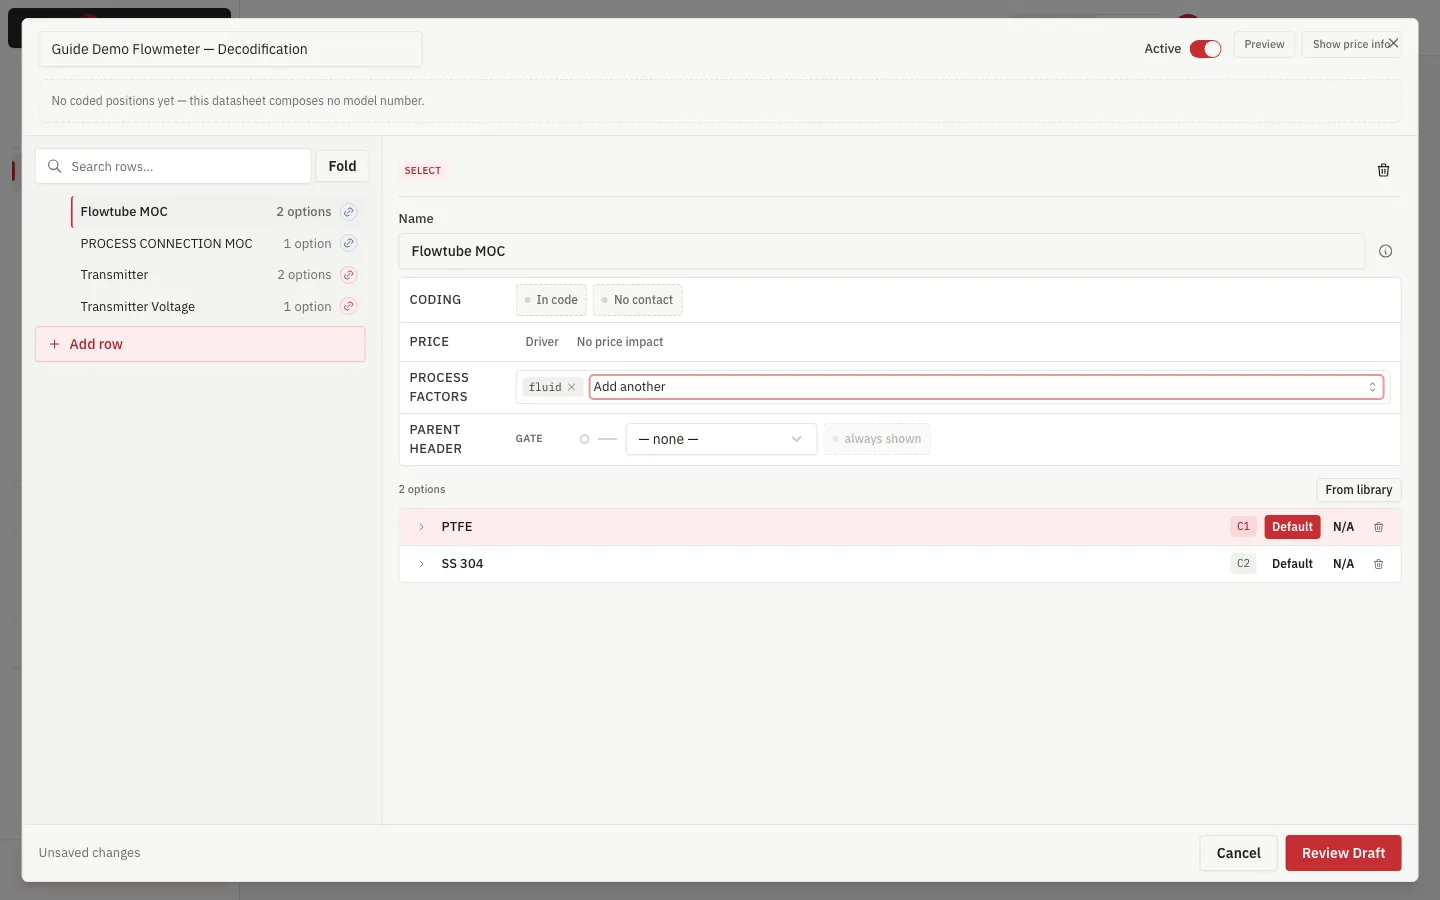
Process factors name which enquiry conditions (fluid, operating temperature, operating pressure, density, …) a row should eventually be judged against. There is no fixed vocabulary yet — it is a free-text chip list, shared with autocomplete across every master:
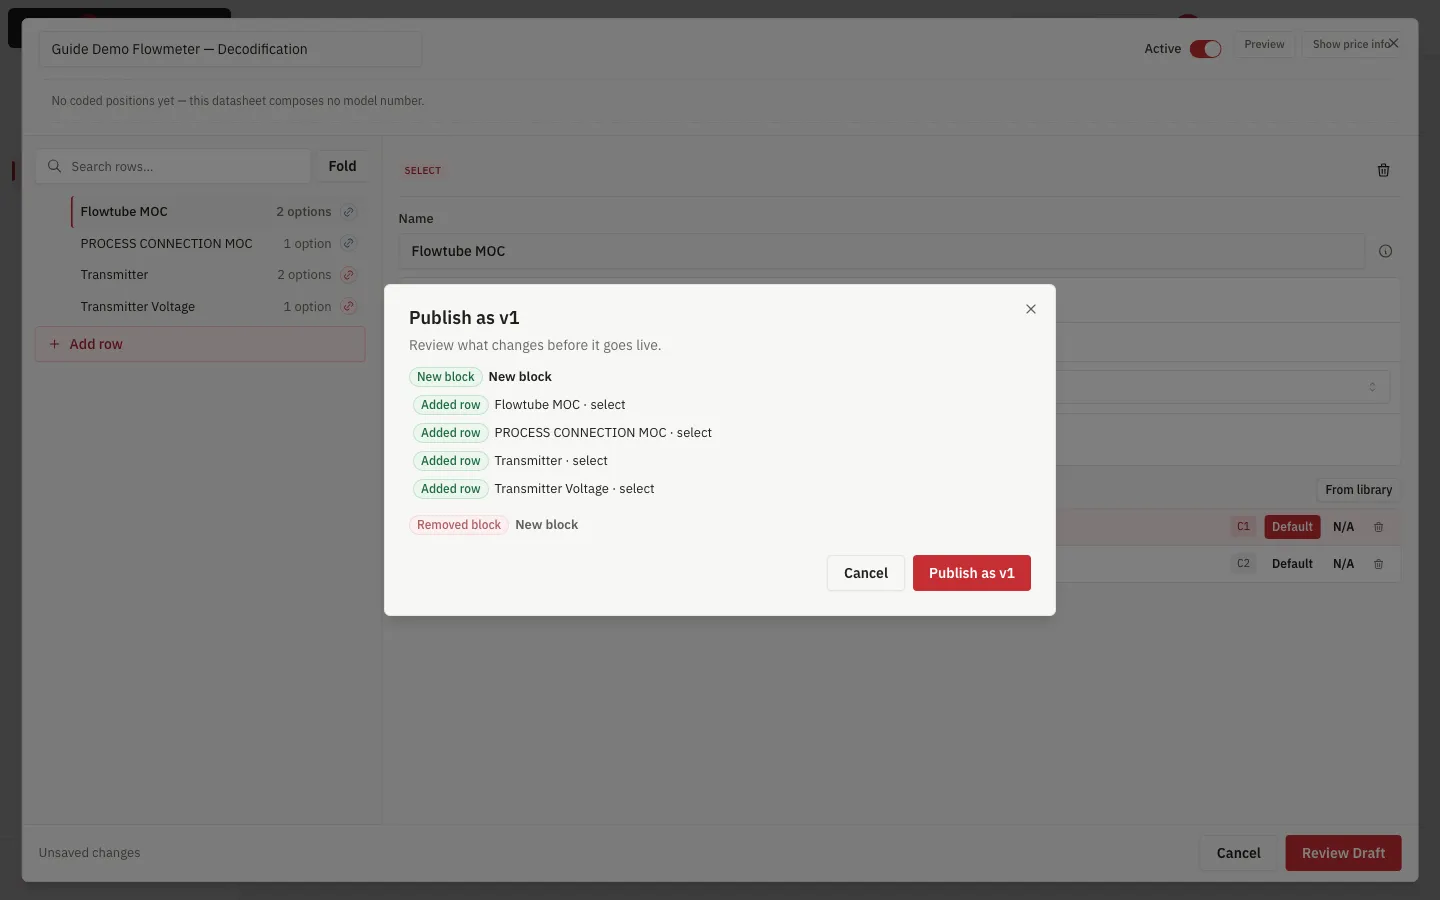
Publishing. A master’s blocks are immutable once published — editing them again always writes a new version, reviewed as a diff before it is confirmed. A metadata-only edit (name, active) saves immediately with no new version.
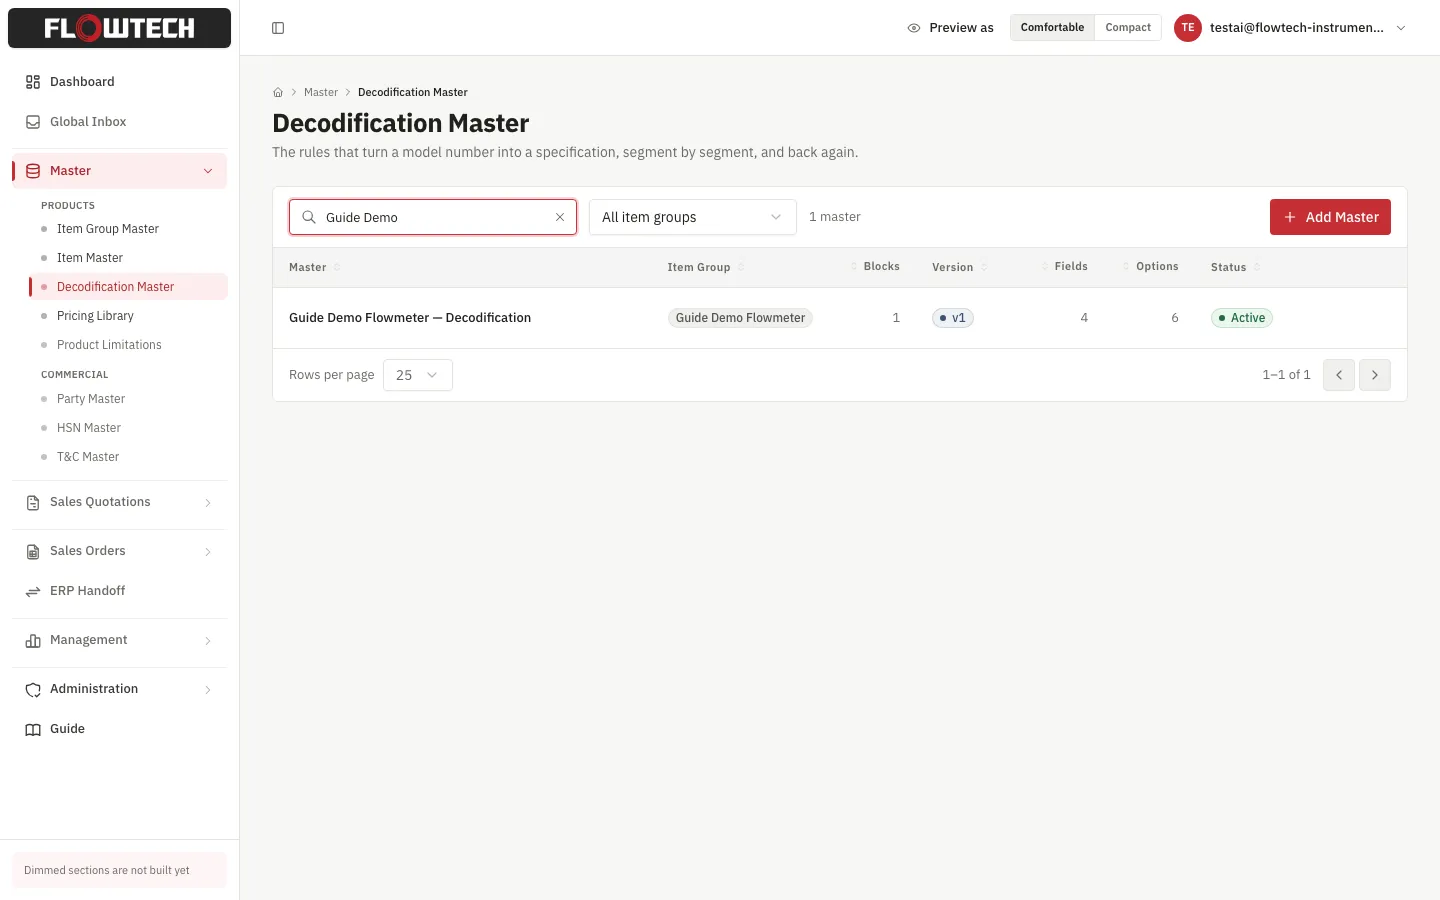
Known gap: publishing a master does not, by itself, point the item group
at it — decodificationMasterId on the group has to be set separately, and
today there is no button in the Item Group dialog that does it. Until that
lands, an administrator sets it directly (PATCH /products/item-groups/:id).
Every family already in the catalogue was set up this way before this guide
was written.
3. Release an item code
Once the group has a current master, it is offered in Master → Item Master → Add Item:
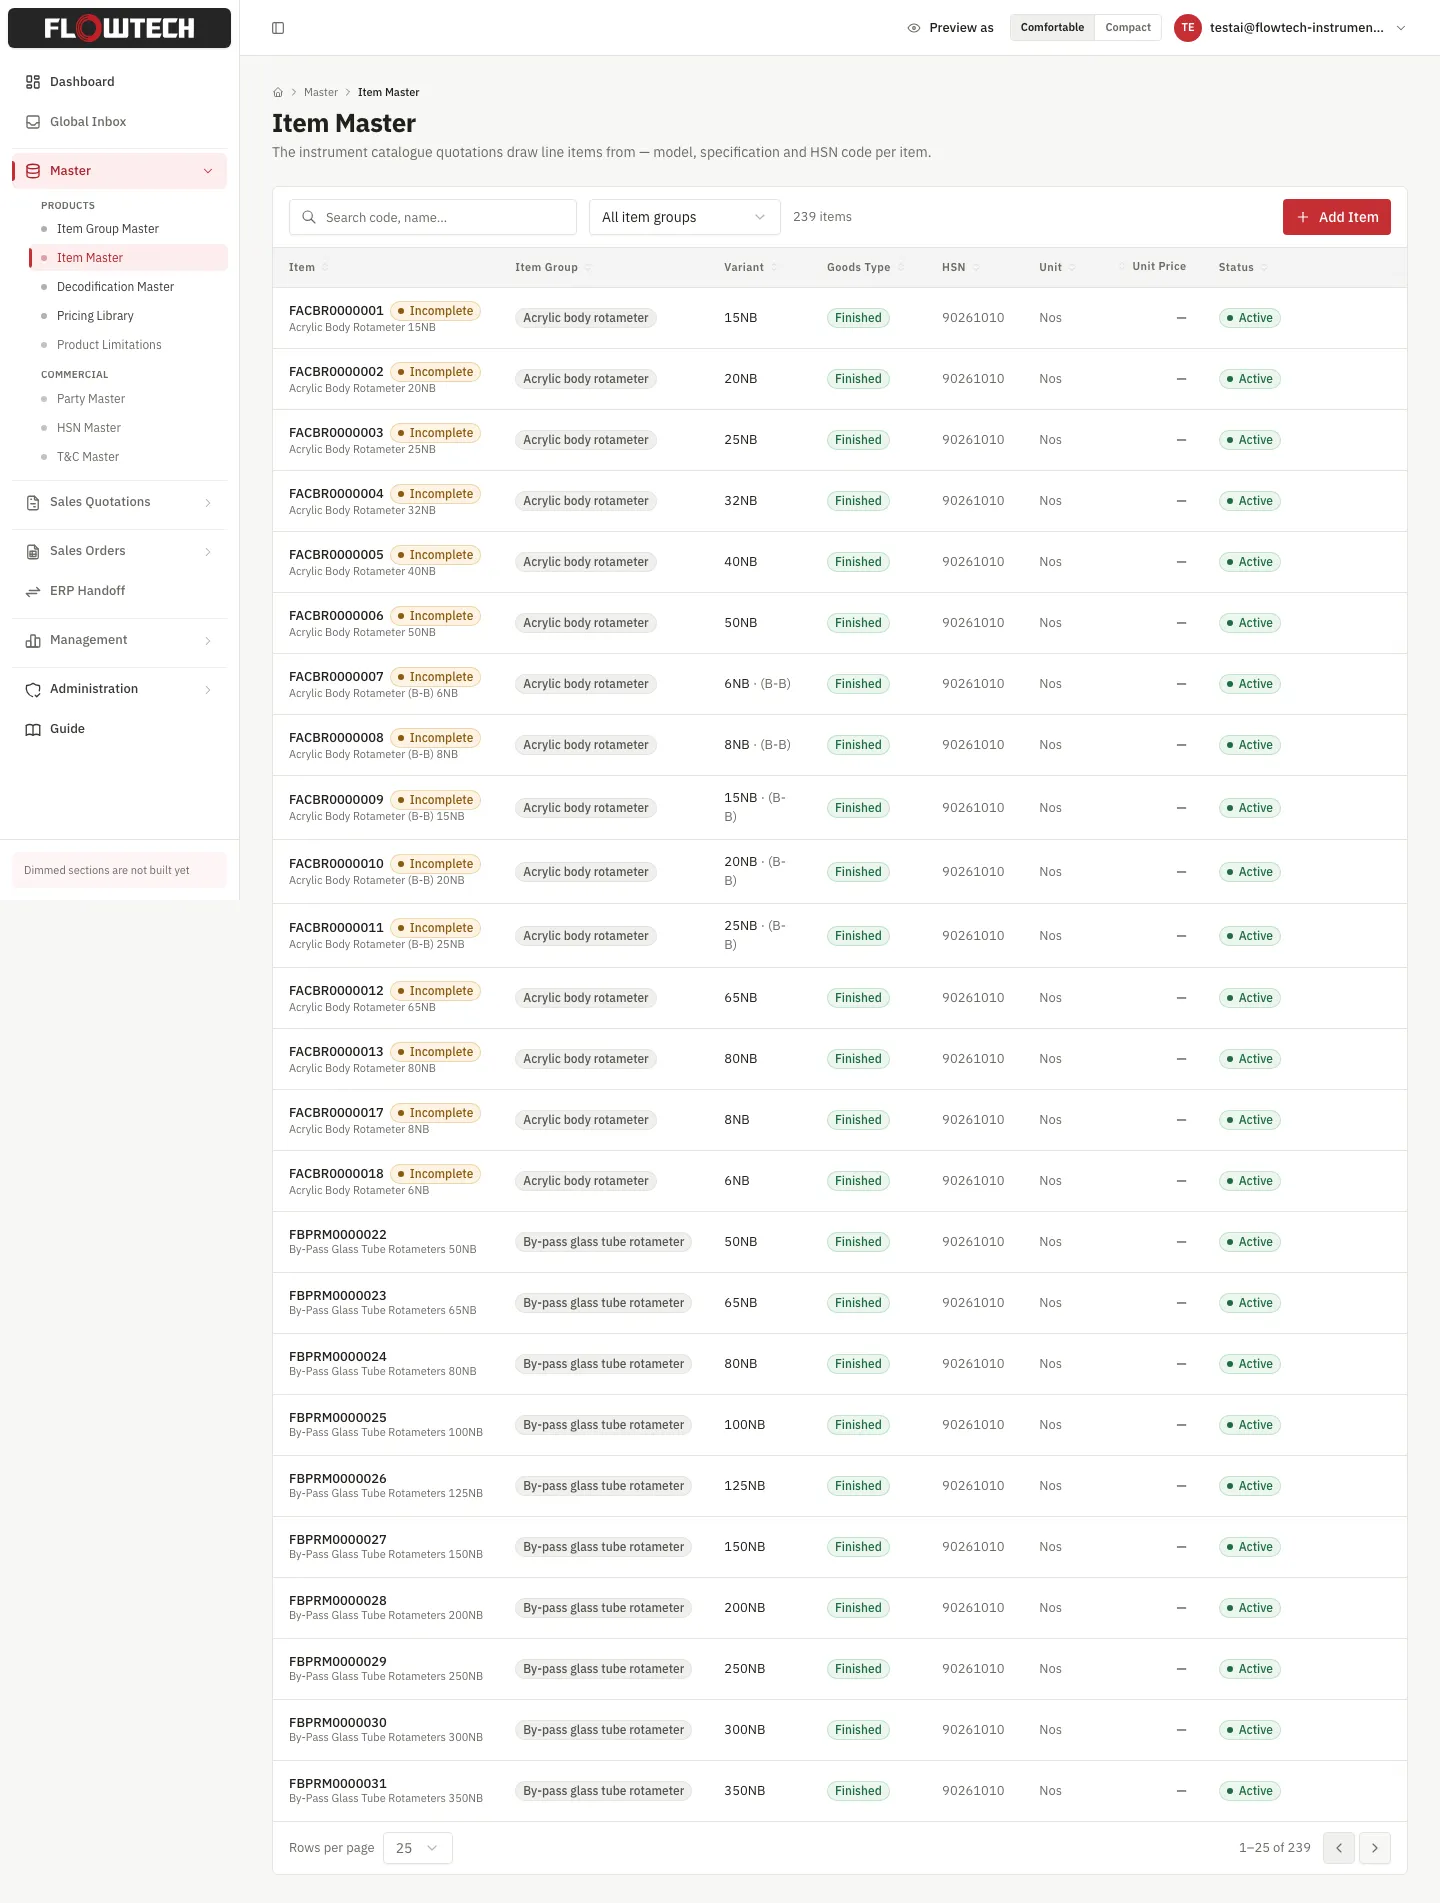
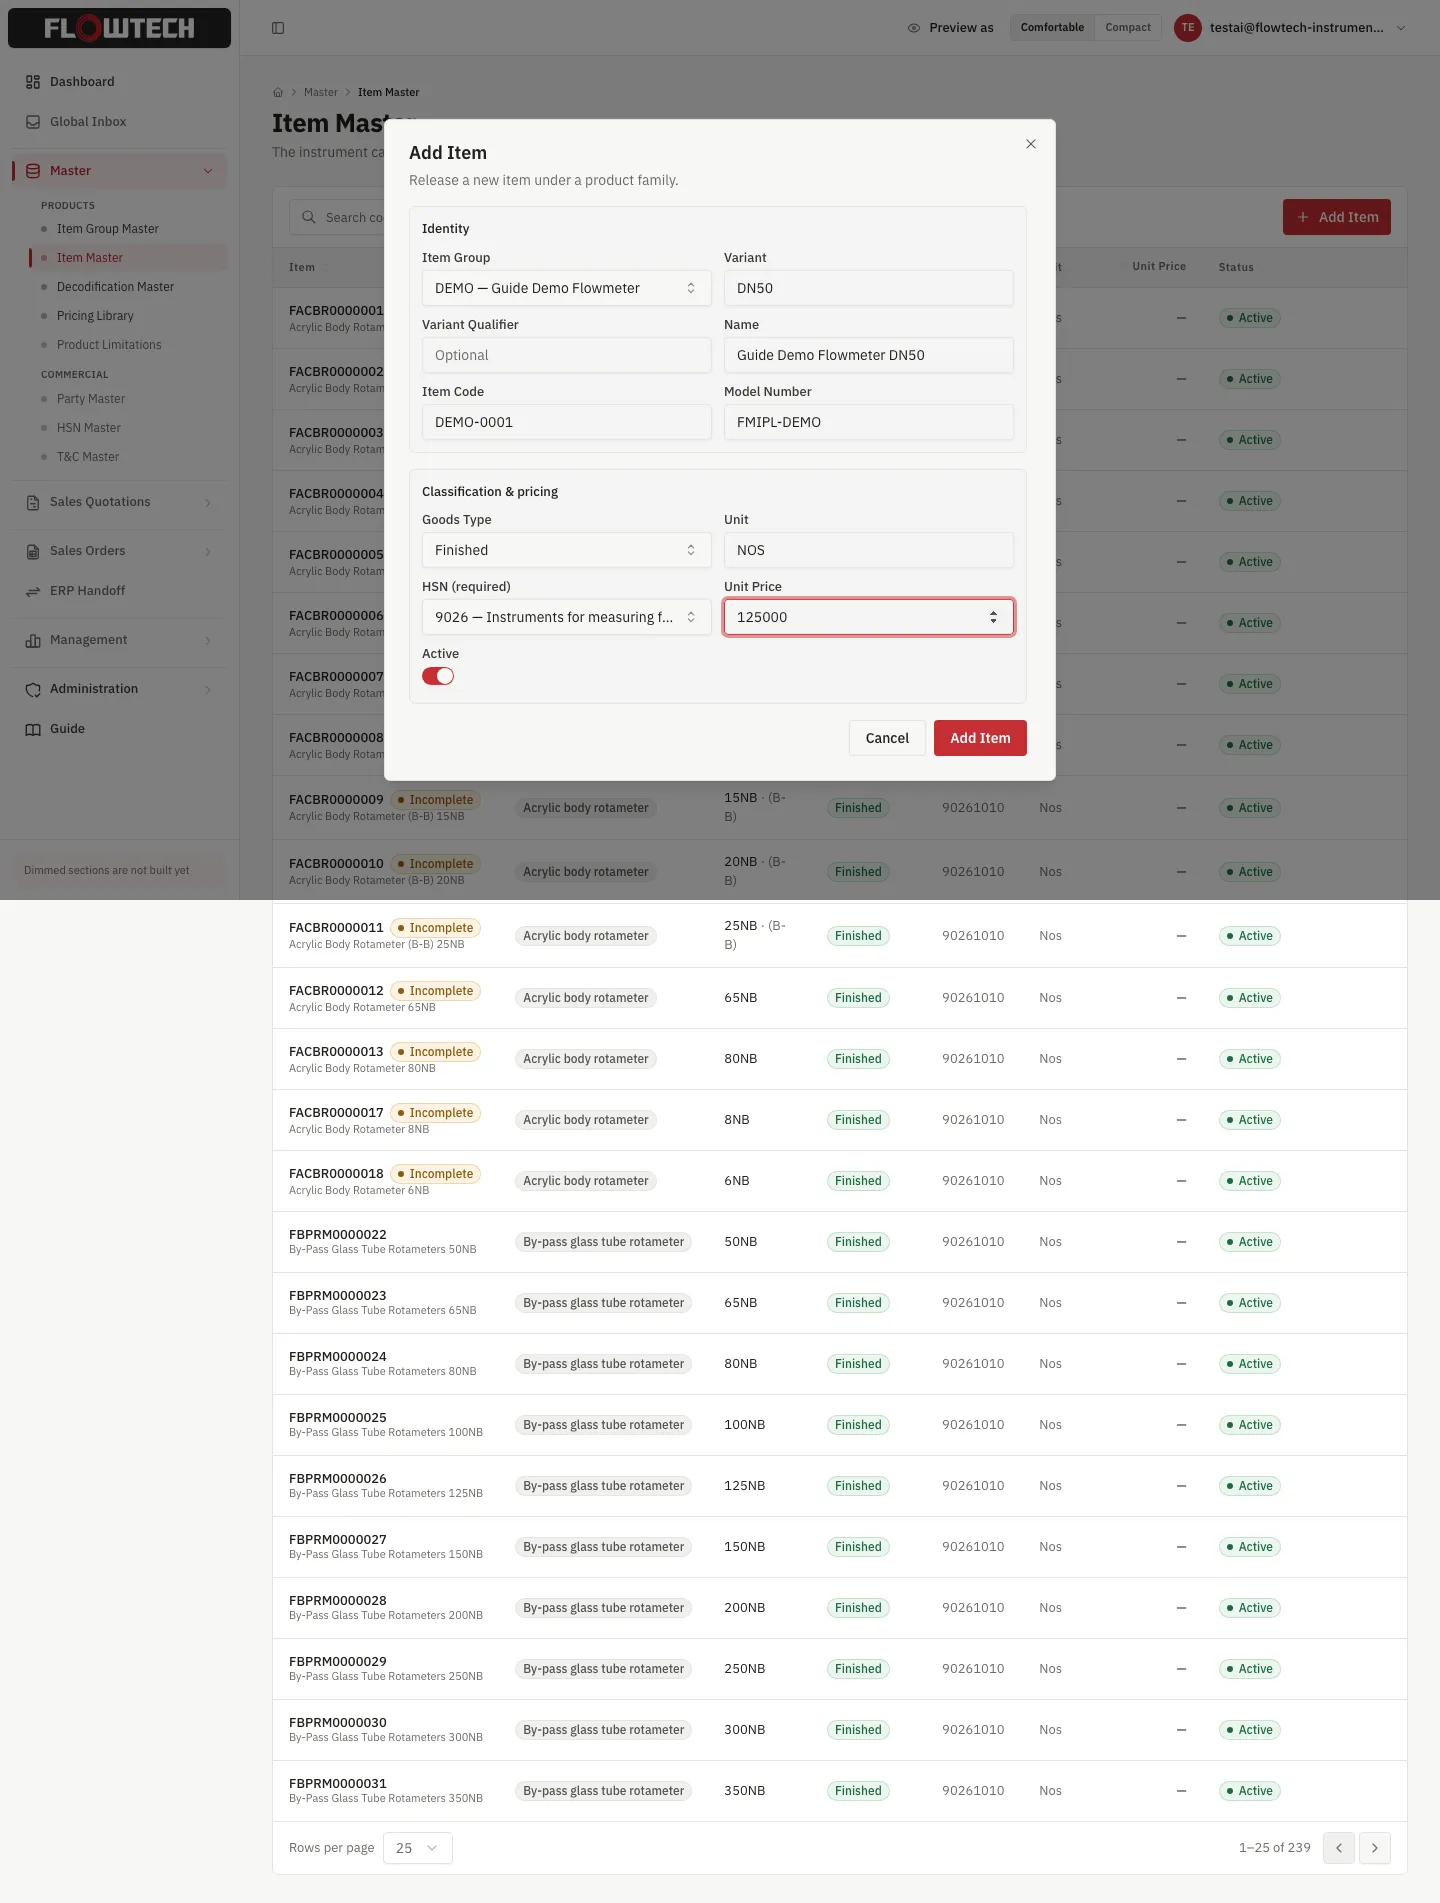
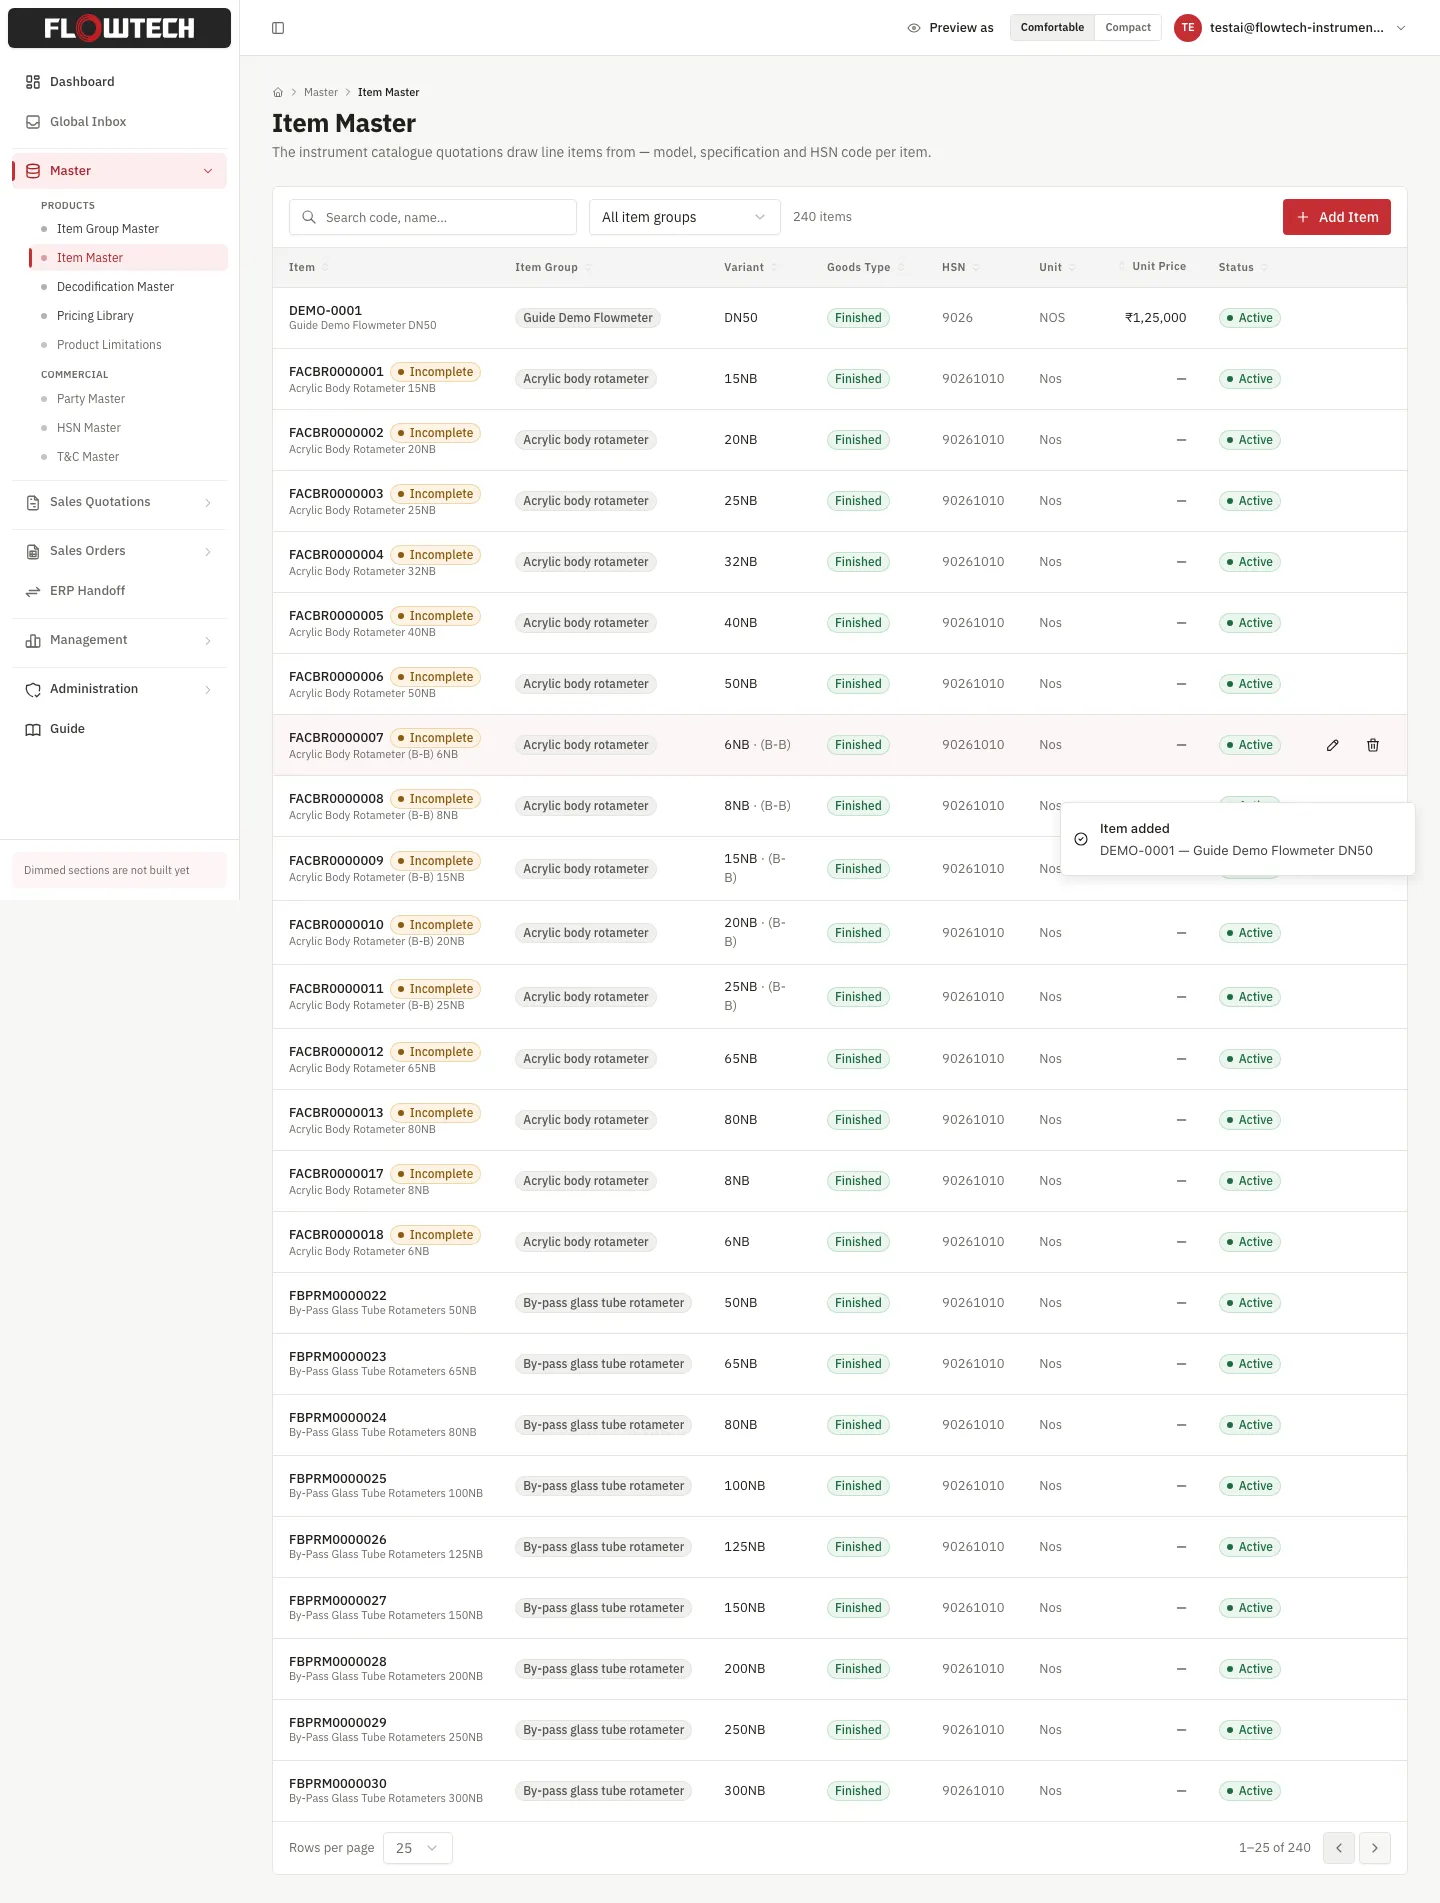
Pick the item group, name the variant (DN50, a pressure range, …), and fill
in classification. Item code and model number both auto-compose from
the group’s prefixes — item code from the prefix plus the next serial, model
number from the model prefix plus whatever the row defaults resolve to. HSN
is required once Goods Type is Finished.
4. Price a driver row in the Pricing Library
Pricing is not part of the group-before-master-before-code sequence above — a row can be marked Driver and priced whenever it is ready, before or after items are released against the group. A menu with real material choices does not price itself: mark the row that should move price, choose how each option is charged, then hand the actual rupee figures to the Pricing Library.
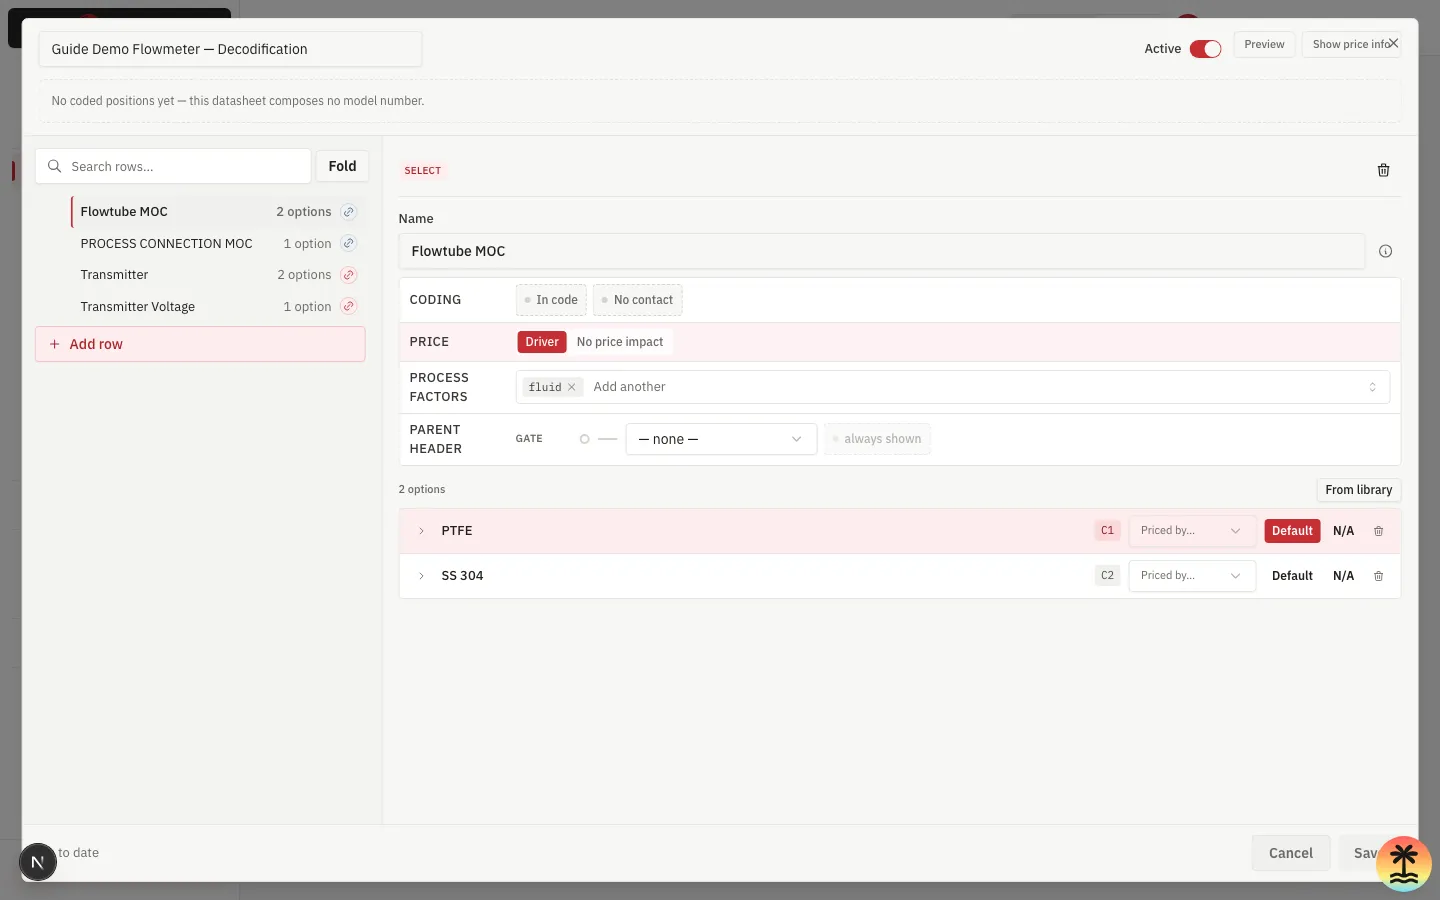
Marking Driver reveals a Priced by… control per option. Opening a select row — here, Flowtube MOC on the Guide Demo Flowmeter family used throughout this guide — shows a PRICE control that starts with no price impact:
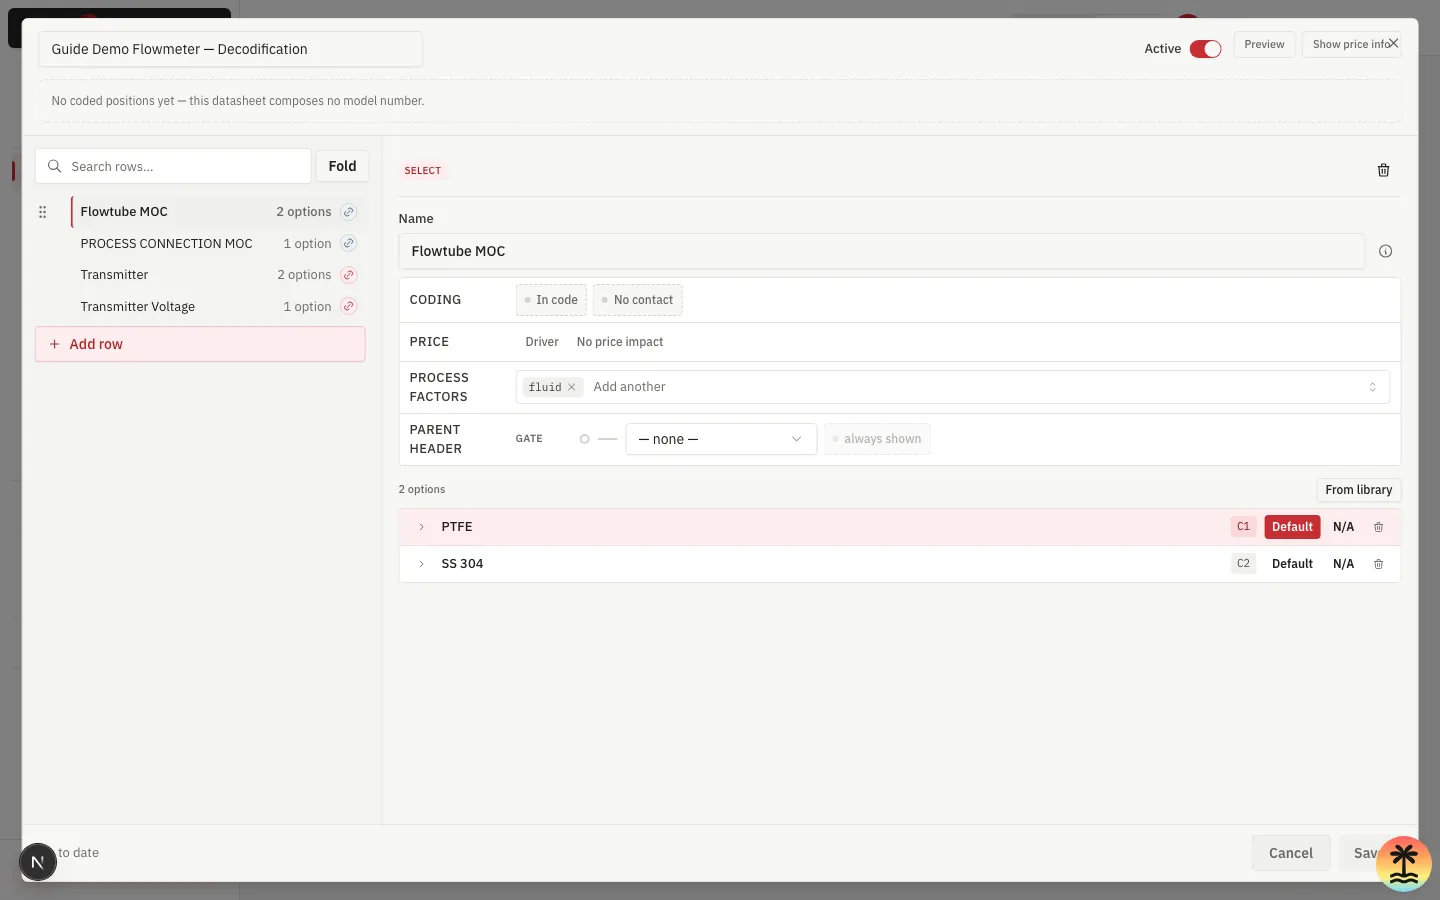
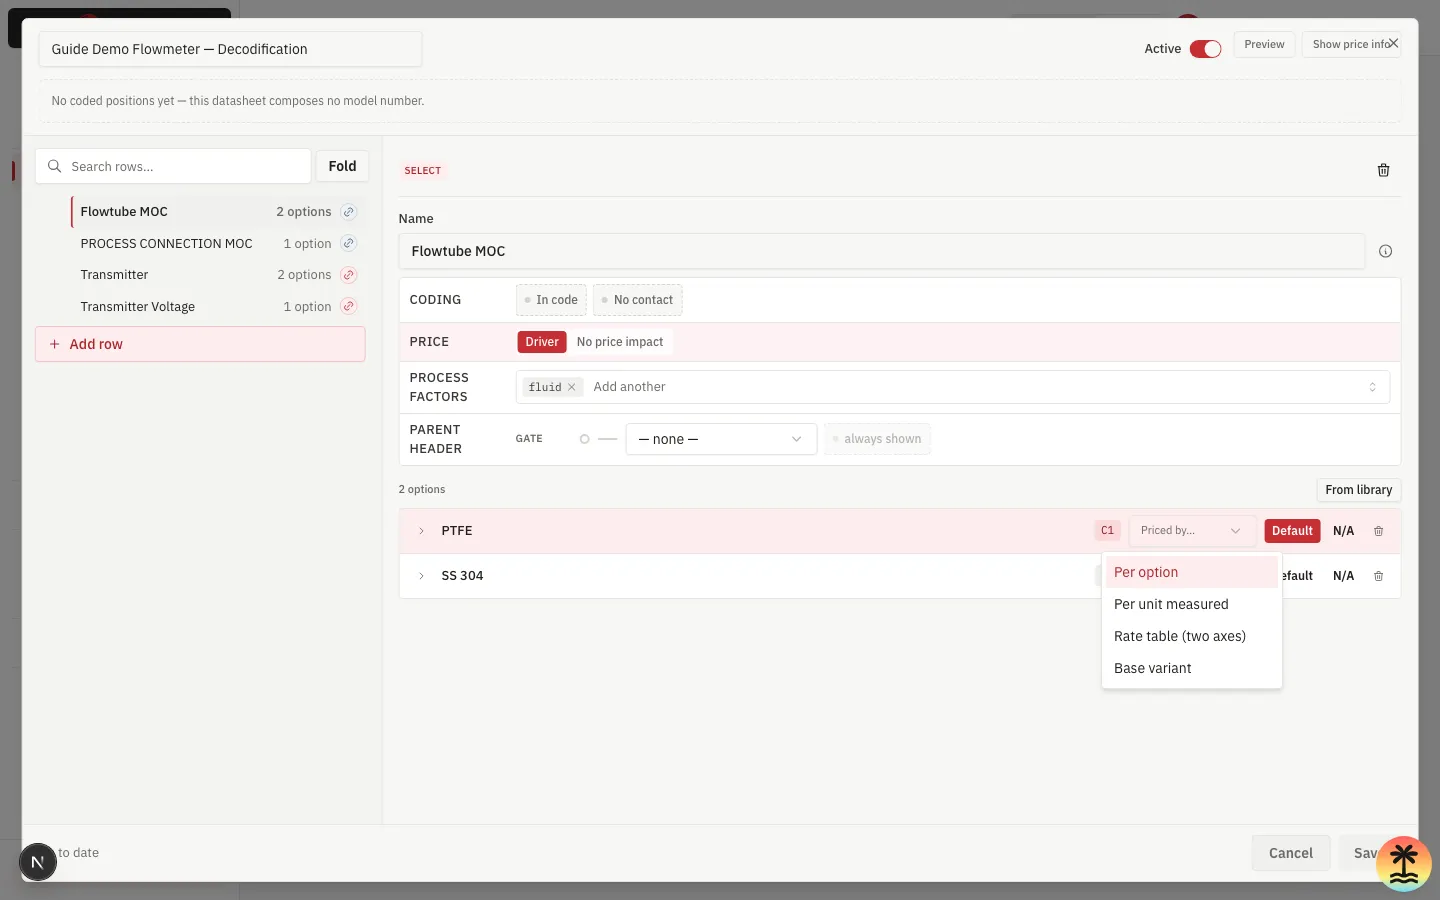
Switching it to Driver saves immediately, and a Priced by… selector appears next to every option on the row:
Four charge methods, chosen per option, not per row — the same row can charge one option a flat amount and another by size:
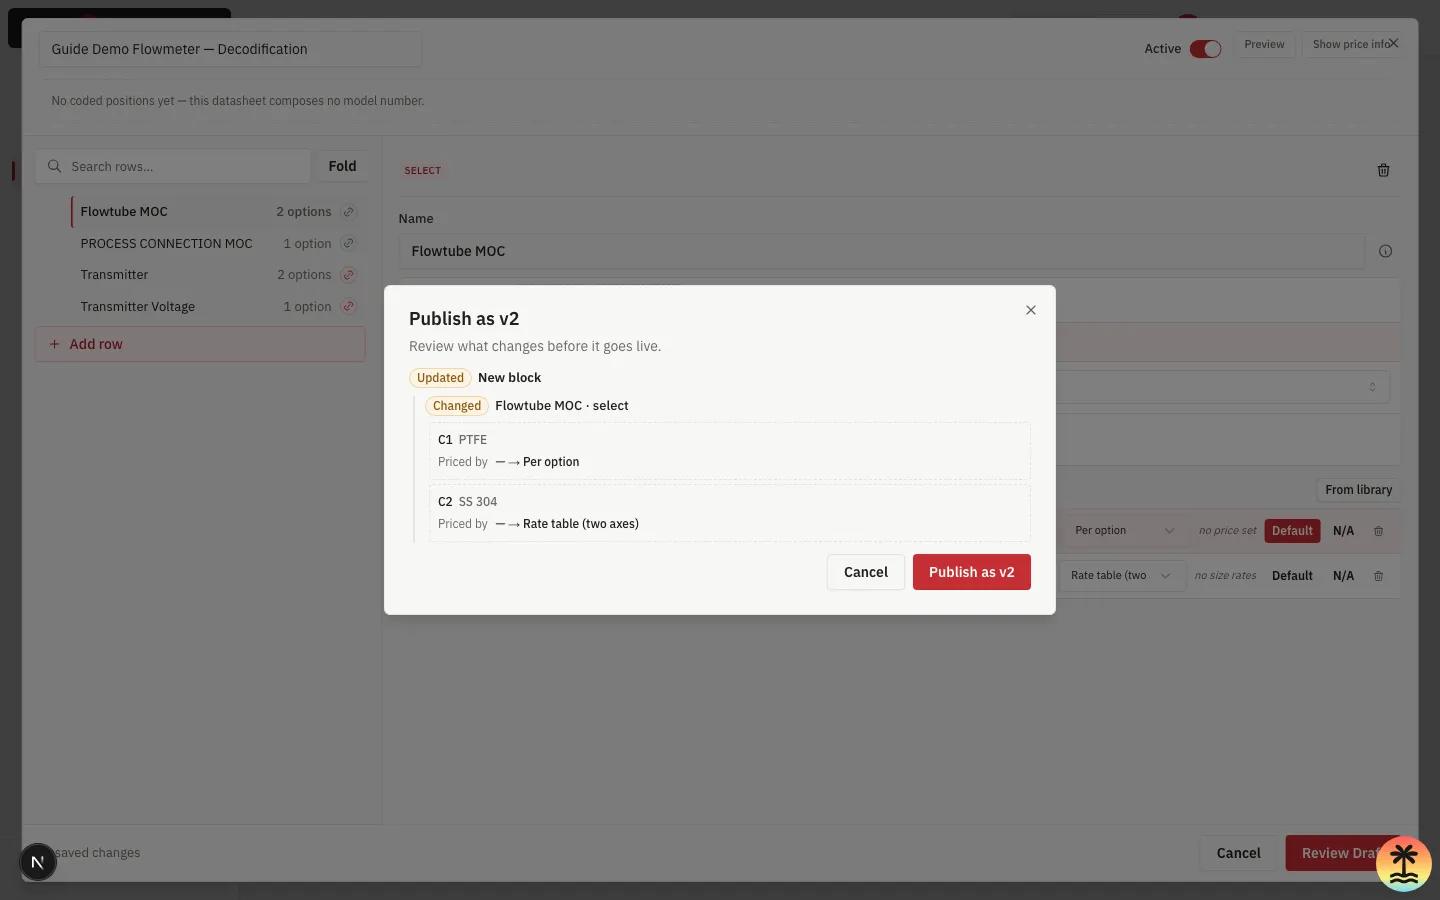
PTFE is set to Per option (a flat figure) and SS 304 to Rate table (two axes) (one figure per size). Unlike marking Driver, a Priced by choice is part of the row itself — it takes a new published version, the same as any other coded-position change:
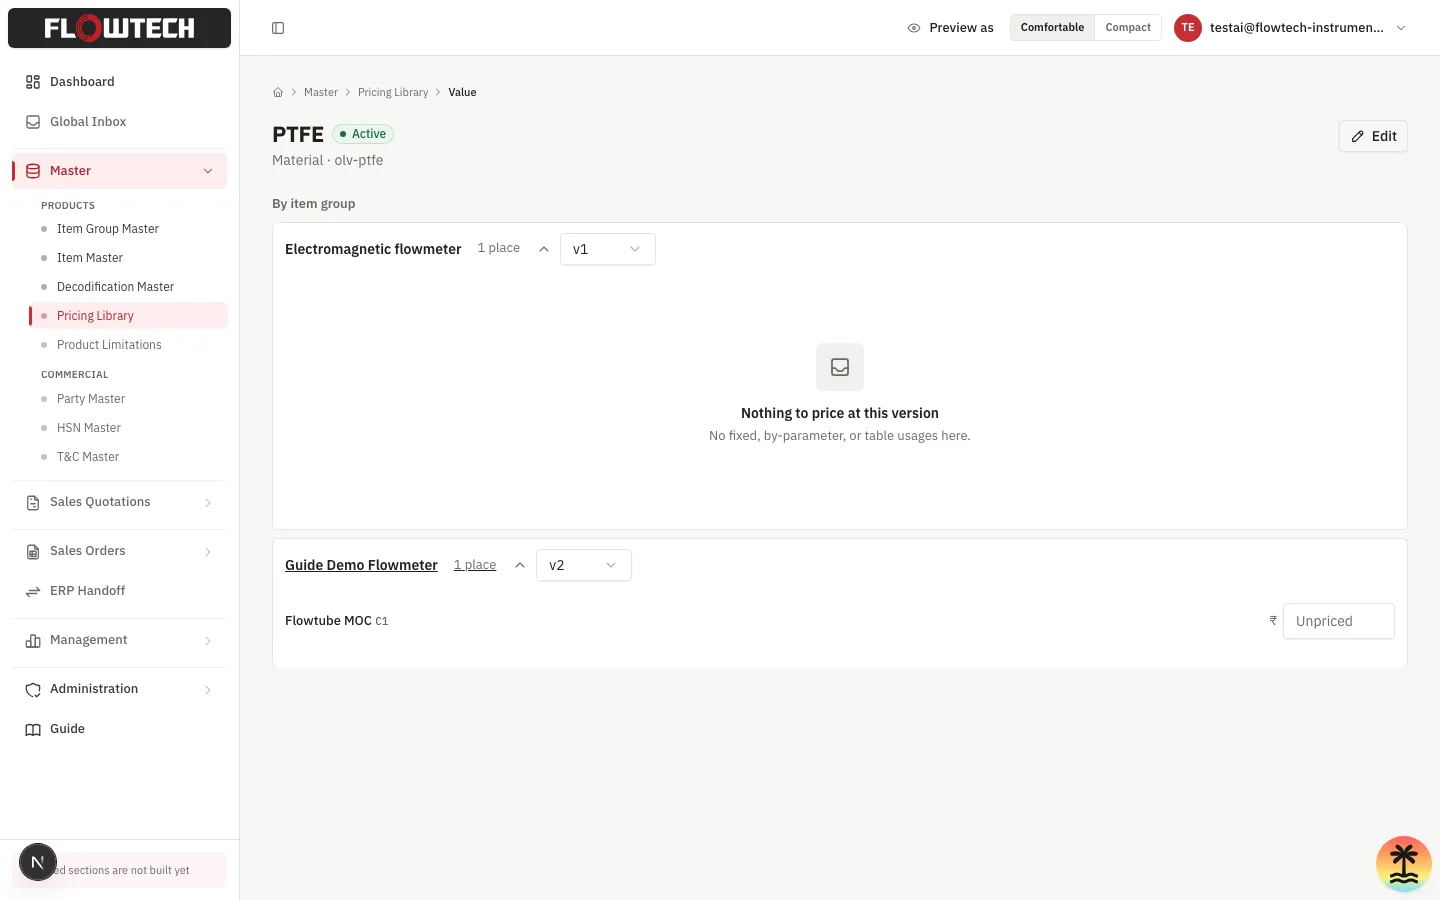
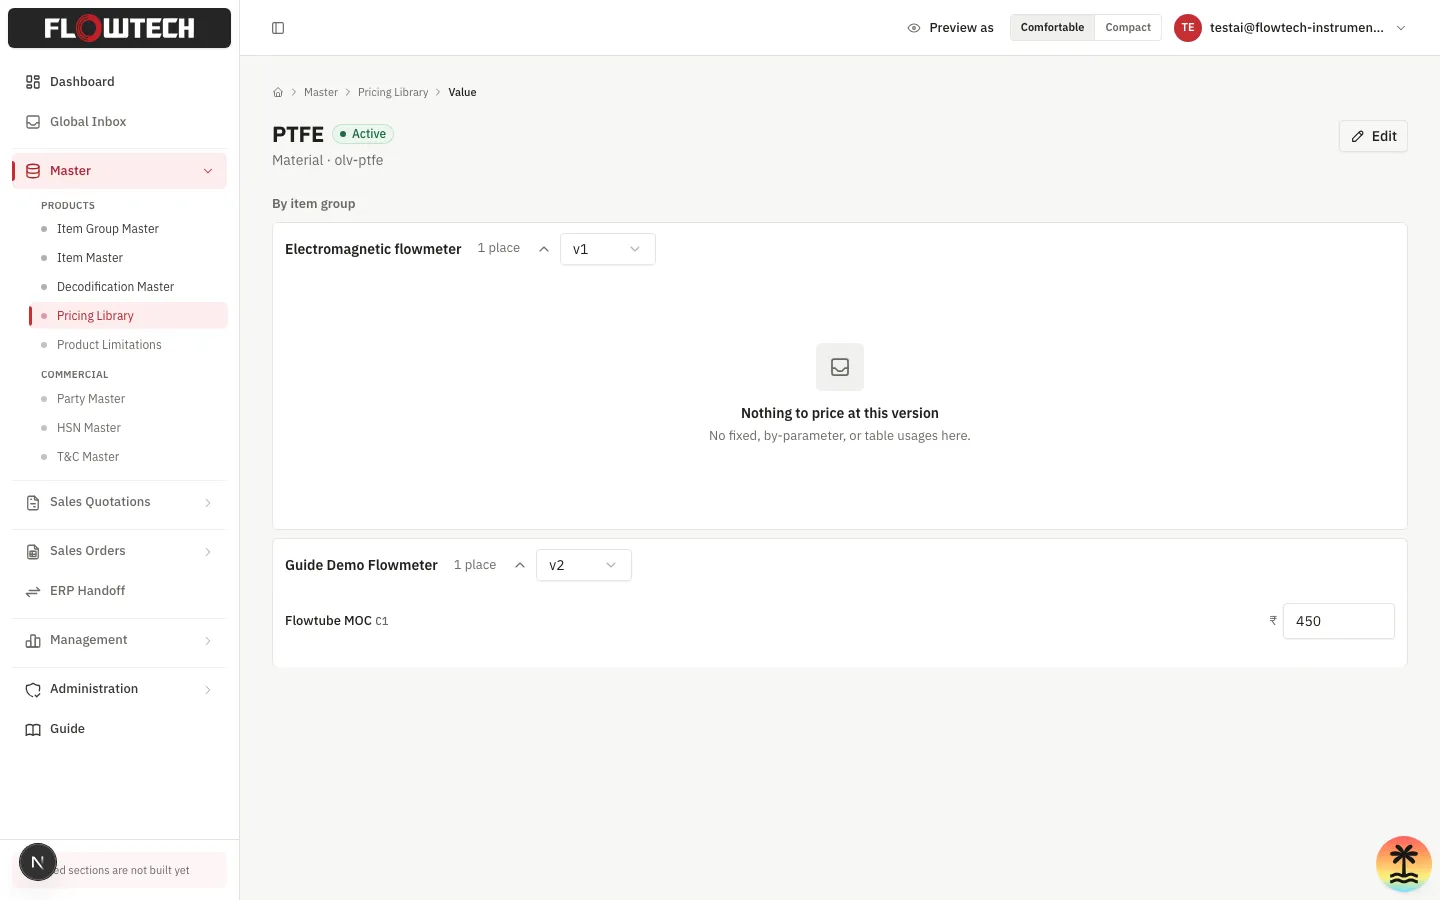
Entering the actual rupee amounts happens in the Pricing Library, not
here. Master → Pricing Library, open the priced value, and its By
item group list shows every group that uses it. A group with a driver row
newly published but nothing priced yet reads “Nothing to price at this
version”:
Entering ₹450 against PTFE’s Per option field prices it for every size at once:
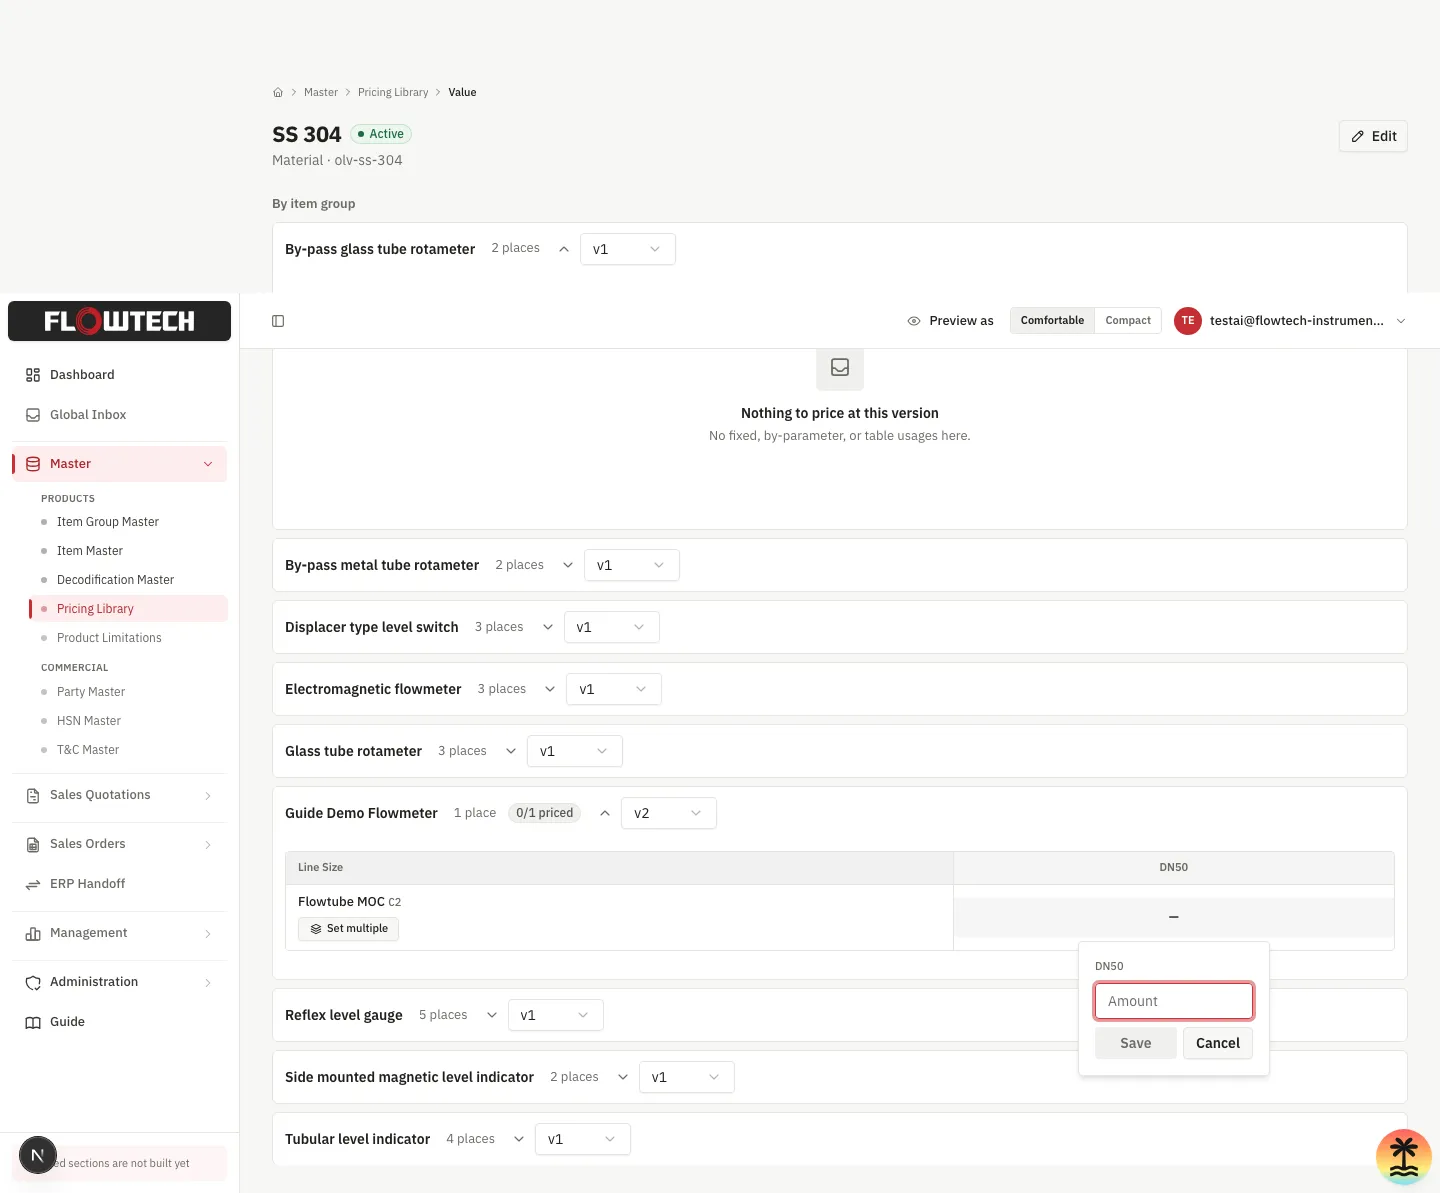
SS 304’s Rate table renders as a grid instead — rows are the item group’s driver rows, columns are its released sizes (here, just DN50, from DEMO-0001 above). Clicking an empty cell opens a small amount field:
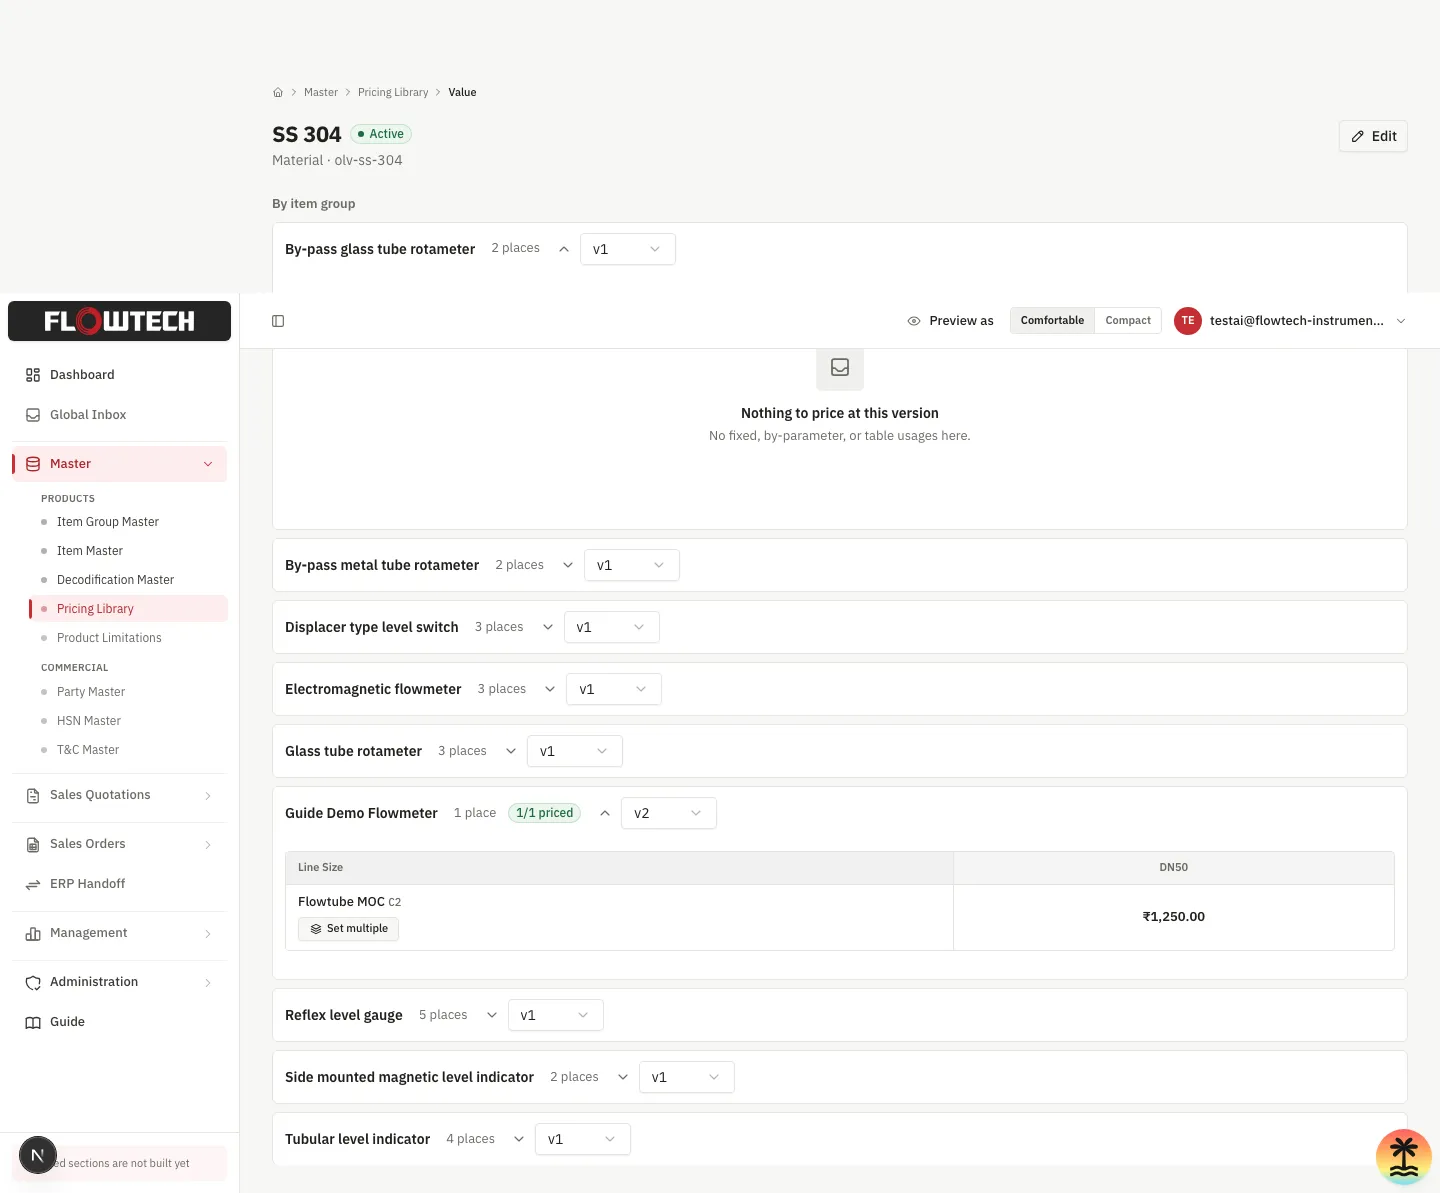
Saving it turns the group’s price-coverage badge from 0/1 priced to 1/1 priced:
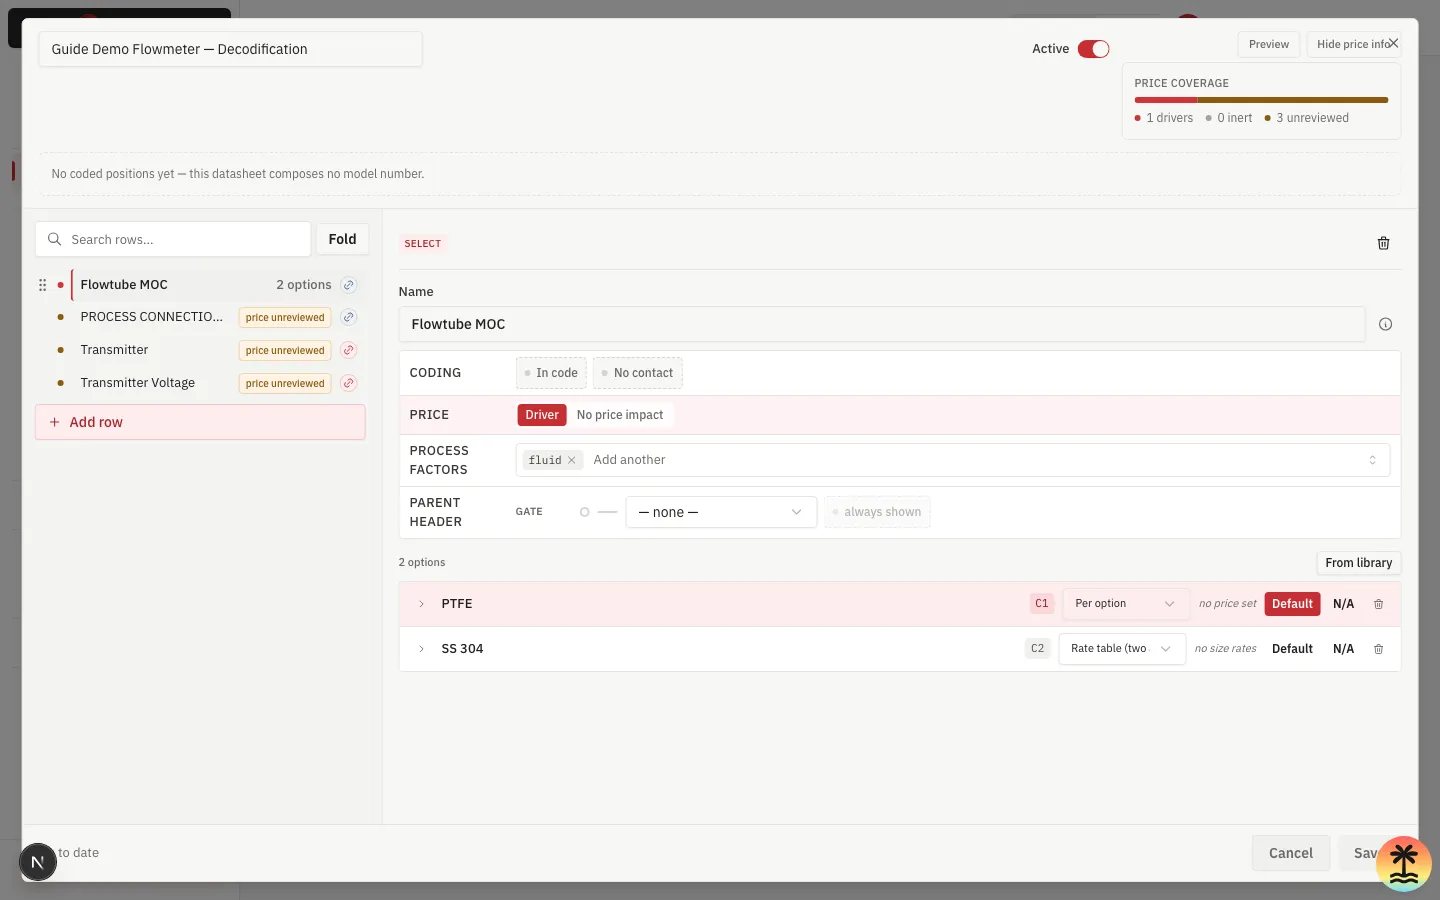
Price coverage, back in Decodification Master. Toggling Show price info in the block editor adds a coverage bar across the whole master — how many rows are drivers, inert, or still unreviewed:
Known gap: as of this writing, a price entered in the Pricing Library
does not refresh the Priced by… control’s own per-option hint back in
Decodification Master — PTFE and SS 304 both still read “no price set” and
“no size rates” there after saving real rates for both, confirmed directly
against the running app and the database (option_rate genuinely carries
both rows; only the row editor’s hint is stale). Worth closing the next
time this area changes.
What the business does here
- Name the family, author its option menu, then release sizes against it — in that order; the product will not let a size skip the menu.
- Keep codes positional: the same material can print a different code on every row it appears on, by design.
- Never edit a published version in place. A correction is a new version, reviewed before it goes live.
- Mark a row Driver and choose each option’s charge method before it can be priced at all; enter the actual rupee figures in the Pricing Library, not in Decodification Master.
Rules that apply
R32–R35 govern how this menu is later shown and resolved on a quotation line. R59 governs how a saved price is overwritten (latest entry wins, no approval). The group-before-master-before-code sequence itself is enforced by the product (confirmed directly against the running app while writing this guide) but is not yet a numbered rule in Business rules — worth closing that gap the next time this area changes.
Related: Item Group Master · Item Master · Decodification Master · Pricing Library.